Add Intents and Utterances
The thread uniting How are you today?, Hello!, Hey, fella! and Hi! is that all of them are variants on the same theme, namely "greeting." In the terminology of virtual agents, the variants are utterances and the theme an intent.
The second step in setting up a virtual agent is to list user intents and utterances. Although a minimally functional agent can work with only four intents (greeting, goodbye, a use case, and exception handling![]() ), it's recommended to keep their number commensurate with use cases. If the virtual agent is going to answer to 50 kinds of queries, then the recommended number of intents is 50 + 3; the latter for greeting and bidding farewell.
), it's recommended to keep their number commensurate with use cases. If the virtual agent is going to answer to 50 kinds of queries, then the recommended number of intents is 50 + 3; the latter for greeting and bidding farewell.
There are three ways to add intents:
- Add intents one at a time
- Import intents
- Accept SearchUnify-suggested intents
Utterances are the words, phrases, and sentences customers employ to express intents. The more utterances are there in an intent, the higher are its chances of being recognized. The virtual agent needs at least five utterances for each intent to function, but it's recommended to add way more than that, which can be done in one of the three ways:
- Add utterances one at a time
- Import utterances
- Accept SearchUnify-suggested utterances
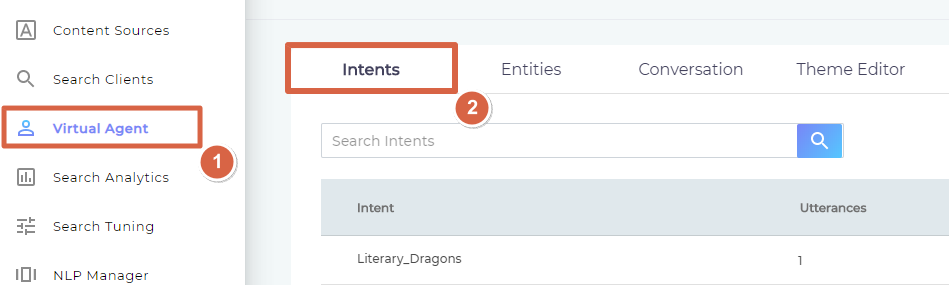
Get to the Intents Screen
- From the main navigation, expand Apps and click Virtual Agent.

- Click
 to view settings.


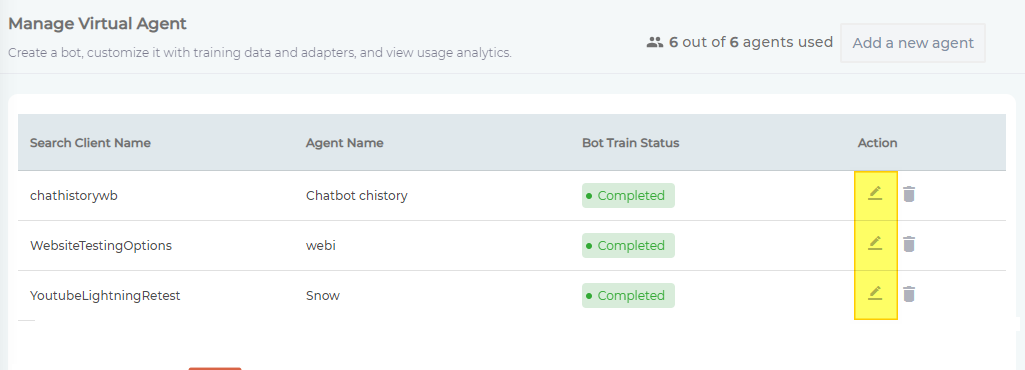
You will be on the Intents screen.
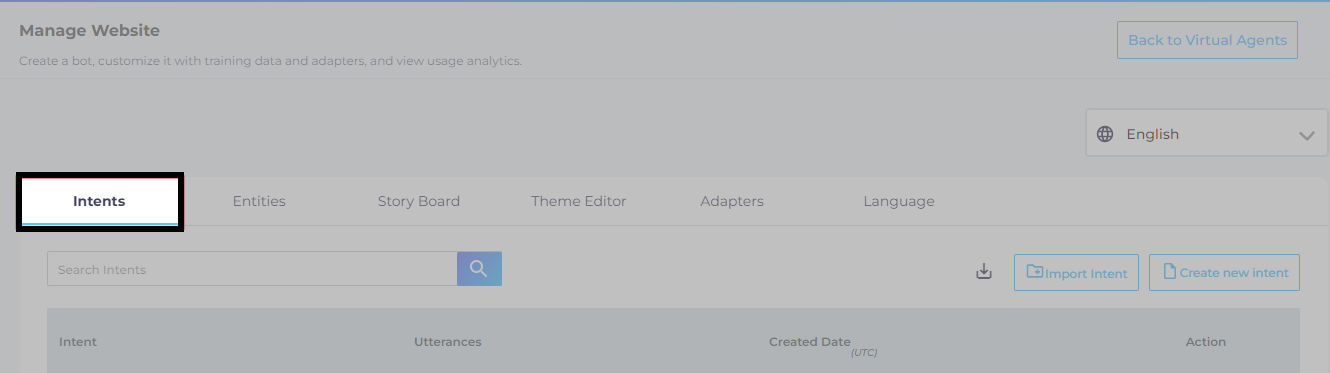
Set Language
Set a language the virtual agent. The utterances, intents, entities, and conversations ought to match the selected language for consistent user experience.
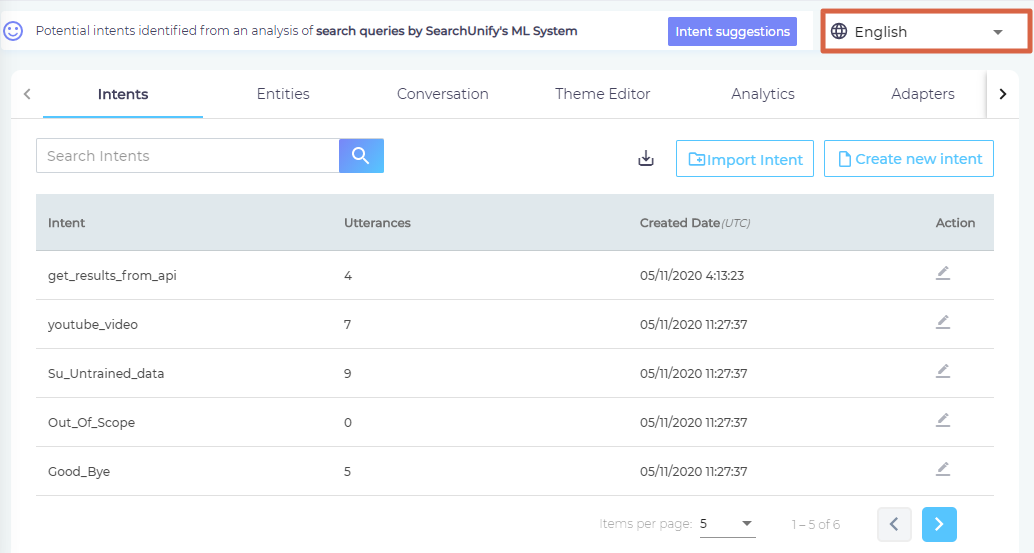
Add Intents
There are three ways to add intents.
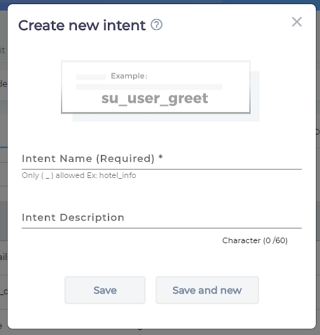
Method 1: One Intent at a Time
Upon clicking Create New Intent, a dialog appears. Enter a label in the Intent Name field, a summary of what it is about in Description (60 characters), and click either Save or Save and New depending on what you intend to do next.
Method 2: Add Intents in Bulk
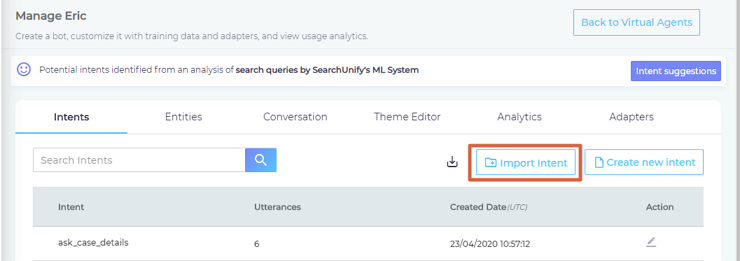
Click Import Intent and select the file where the intents are stored. Only CSV files are accepted. For the format in your CSV file, check Download Sample.
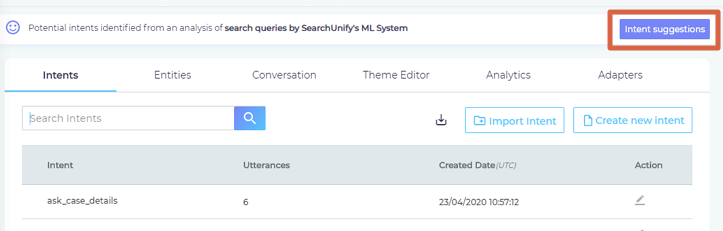
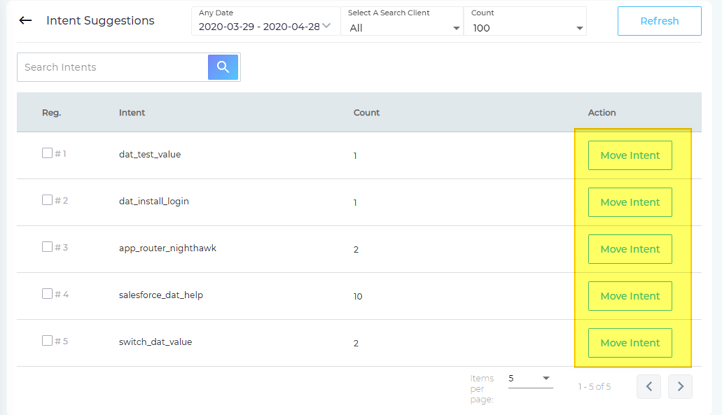
Method 3: Accept SearchUnify-Suggested Intents
- Click Intent Suggestions.
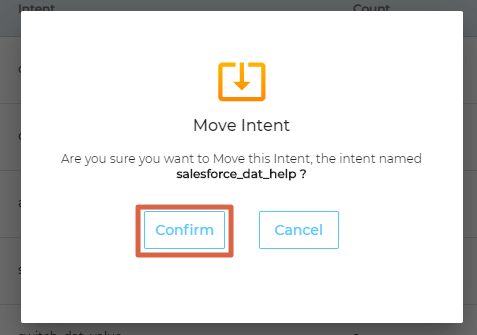
- Click Move Intent.

- A dialog will open, click Confirm.


Add an Utterance
There are three ways to add an utterance.
NOTE.
Add as many utterances as possible.
If you want to capture the intent "HOW TO ADD A CONTENT SOURCE?", you can add the following utterances: (1) add content source, (2) configure content source, (3) content source configuration , (4) content source addition , (5) how to add a content source, and (6) how to configure a content source. You will notice that a few keywords repeat in these utterances, such as add, configure, and content source.
The repeating keywords train your virtual agent, enabling it to capture an intent from a large number of utterances with the correct keyword.
Method 1. One Utterance at a Time
- Click on an intent.
- Write an utterance in the search box and press Enter.


NOTE.
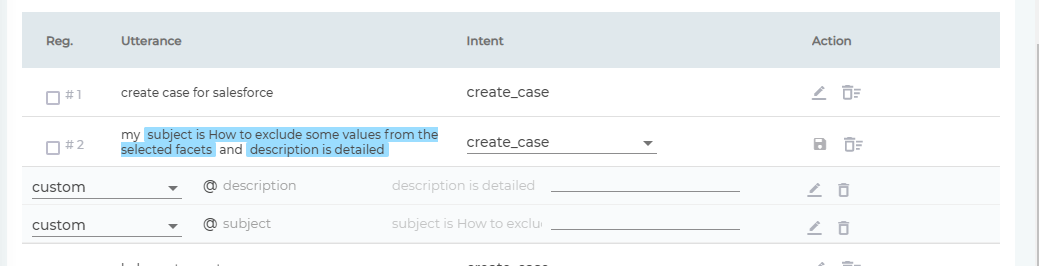
You can insert entities in your utterances. The entities can be admin-defined (custom) or fetched from the system you're using. Here's what an intent with custom entities looks like.

Method 2. Add Utterances in Bulk
Click Import and select the file where the utterances are stored. Only CSV files are accepted. For the format in your CSV file, click ![]() .
.
Method 3. Accept SearchUnify-Suggested Intents
When you accept SearchUnify-suggested intent, all the utterances contained thereof are also added. For details, consult Method 3: Accept SearchUnify-Suggested Intents.
Related
- Previous step: Create a Virtual Agent
- Next step: Create Entities for Use in Intents and Responses
Adding an Intent
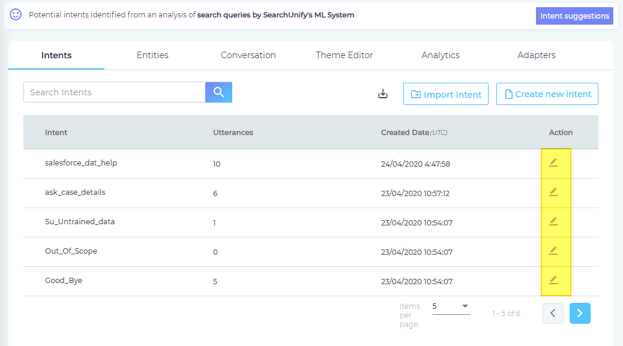
- Navigate to Virtual Agent from the main navigation. The Intents tab will be open by default. The tab has five sections.

Four Sections in the Intent Tab
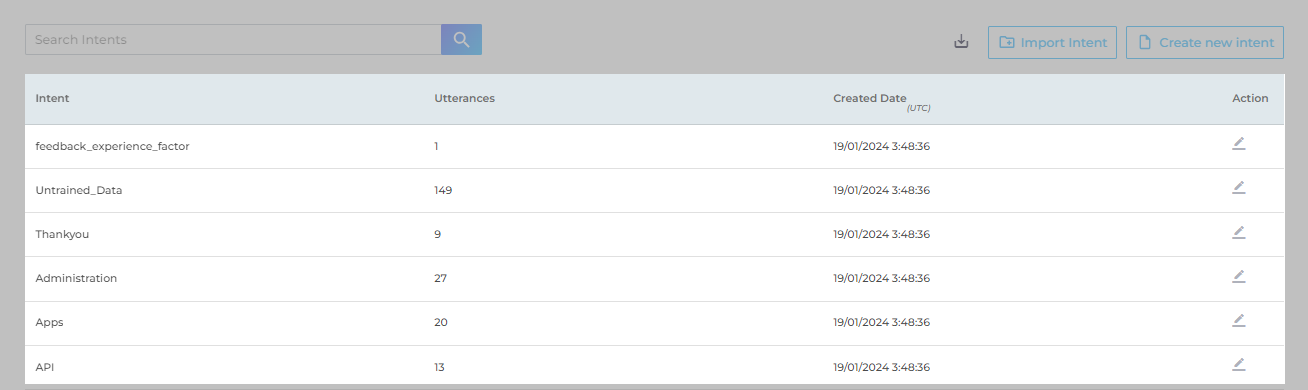
- Search Bar: Find existing intents.
- Download Sample(
 ). View a CSV file with sample intents. It is useful if you plan to upload intents in bulk. SearchUnify accepts intents in bulk only if they are in a specific format and the Download Sample ()provides you the format.
 - Import Intent: Add intents in bulk. Only CSV files are accepted. For the format in your CSV file, check Download Sample.
- Create New Intent: Add intents one at a time. Upon clicking, a pop-up appears prompting you to enter the name of the intent and its description (max 60 characters). The name is mandatory but the description is optional. SearchUnify Chatbot does not support intent names with special characters except underscores.
Adding an Utterance
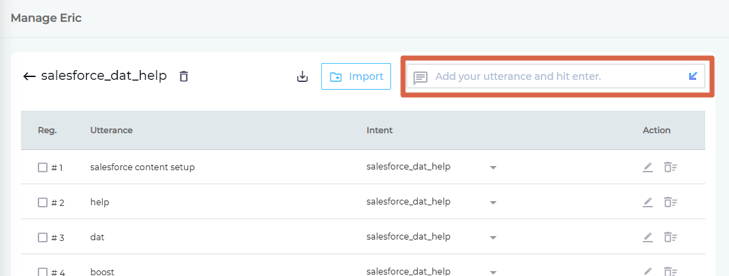
Once you have successfully created and saved an intent, you can start add utterances to it. TIP![]()
- Click to start adding utterances.

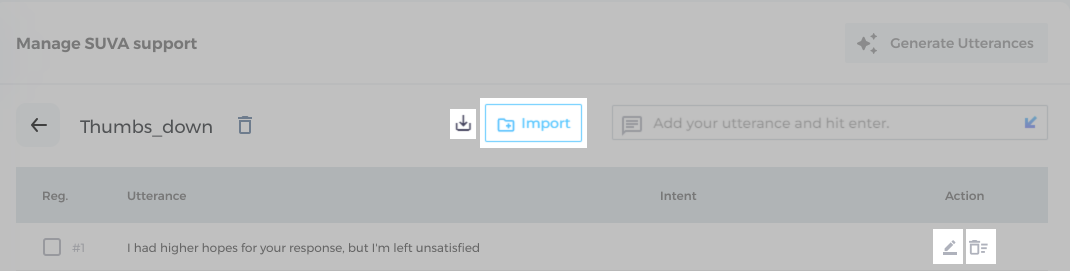
Five Sections in Edit Utterances
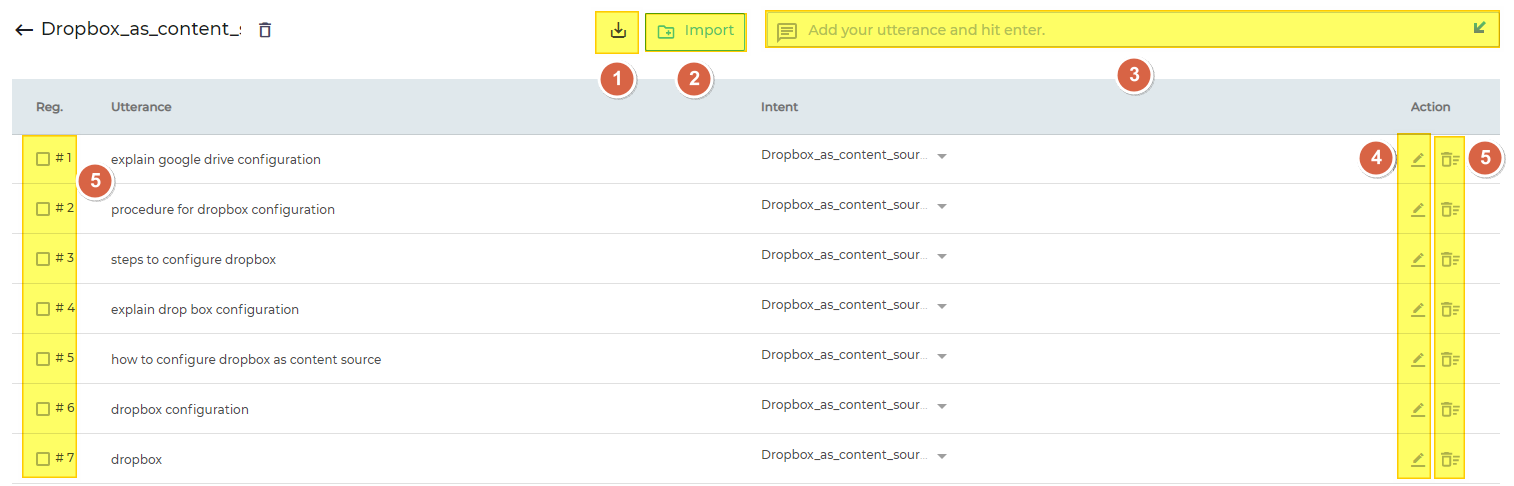
- Download Sample (): View a CSV file with sample utterances. It is useful if you plan to upload utterances in bulk. SearchUnify accepts utterances in bulk only if they are in a specific format and the Download Sample () provides you the format.
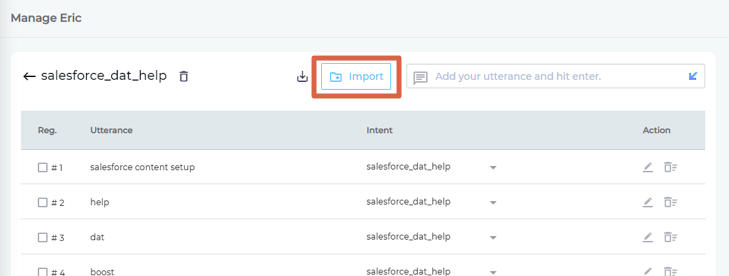
- Import: Add utterances in bulk. Only CSV files are accepted. For the format in your CSV file, check Download Sample Button.
- Input Box: Add intents one at a time. Enter an utterance in the box and hit Enter to save it.
- Edit: Assign an utterance to another intent.
- Delete: Remove an existing utterance (right) or remove multiple utterances at once by checking the boxes on the left.