Create Entities for Use in Intents and Responses
Intent match is the first step to getting things done. Once you have figured out what your users are saying, the challenge is to dive into the specifics.
Why Use Entities
Assuming you have installed a virtual agent on your support community, a user might interact with it for several reasons. The top ones tend to be:
- Check a ticket's status
- Log a ticket
- Talk to a support rep
- Find an article
Consider the first intent "check a ticket's status." What do you do next once it has been identified? The obvious answer is to respond with a progress report and it's as easy as it sounds if you have only one ticket in your entire system; in which case you will probably not be using a virtual agent. In case your organization has more business, more clients, and more tickets, your virtual agent trainer is left with two options:
- Every time a new ticket is logged, create an utterance with its ID and group it with other utterances in the intent "check a ticket's status" so that if the user returns to find out
the status of their ticket, your virtual agent can detect the ticket ID and answer accordingly.

- Use entities to extract ticket IDs each time "check a ticket's status" is spotted.

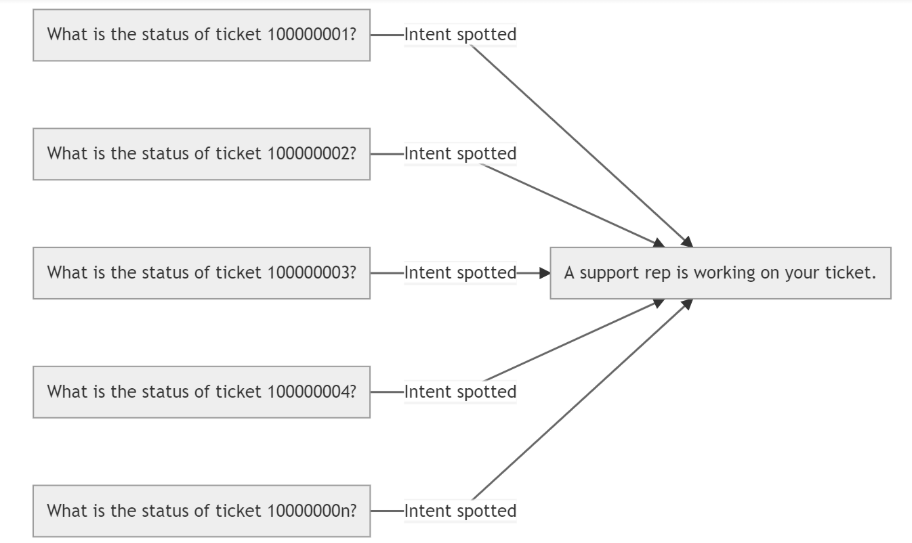

The first method is great if you have eons at your disposal and loads of free money and no fear of losing business. The second is the approach most readers will agree with because it far easier to create an entity TICKETID and let it extract information from an intent than generate a horde of utterances differing only in a number. And that brings us to the definition of an entity.
An entity is an collection of related values with a name. The values can be numbers, such as number of people going on a vacation; time, such as days of the month or week; and/or strings, such as crust of a pizza or the type of a car.
The information can be of several kinds. A ticket ID can be a long string of digits, sometimes punctuated by alphabets. A date can also be an entity and so can be a customer name. SearchUnify supports them all.
Supported Entity Types
Entities in SearchUnify are of two kinds.
System Entities
There are four of them.
sys.number. To identify and extract numbers from an utterance. Examples:- My phone number is
23491323. - He is
27years old.
- My phone number is
system.date. To identify and extract a date from an utterance. Examples:- I logged a ticket on
24 January, 2020. - Since
May 17, 2020, there has been no response from your company.
- I logged a ticket on
system.date.month. To identify and extract a month from an utterance. Examples:- I logged 10 tickets in
July. - There must be some cheap flights to Bethlehem in
September.
- I logged 10 tickets in
sys.date.year. To identify and extract a year from an utterance. Examples:- The data breach occurred in
2019. - Can you completing the construction of my house before
2022?
- The data breach occurred in
Custom Entities
Then comes the singular custom entity which is used to extract specific keywords from an utterance. Let's assume that you sell pizzas. Depending on the crust, cheese, and other ingredients used, the variety available of cooked pizzas is infinite. However, each ingredient has only a few types. In such scenario, you can create an entity out of each ingredient and insert each type of that ingredient as a value.
| Entity | Values |
| Cheese | Mozzarella, Cheddar, Harvarti, Gorgonzola, Provolone, Pecorino |
| Crust | Thin, Flatbread, Thick, Focaccia, Stuffed, Neapolitan |
In case a customer asks for "a flatbread pizza with gorgonzola", then your virtual agent can extract the correct cheese and crust type.
Let's Not Forget Synonyms
If an entity groups related values then Synonyms captures the variations on each value.
What can a customer in need do? Should he log a ticket? Or probably a complaint? Or probably a case? Or probably... you get it. Complaint, case, and ticket are variations on the same theme: a formal request for help. As an admin, you can create an entity by the name of help and set complaint, case, and ticket its synonyms. '
Enough of theory. In the next section, you will learn to create and import entities.
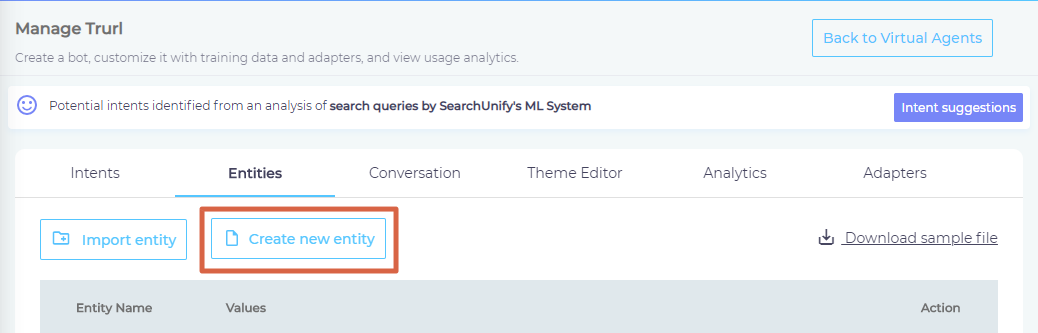
Create Entities
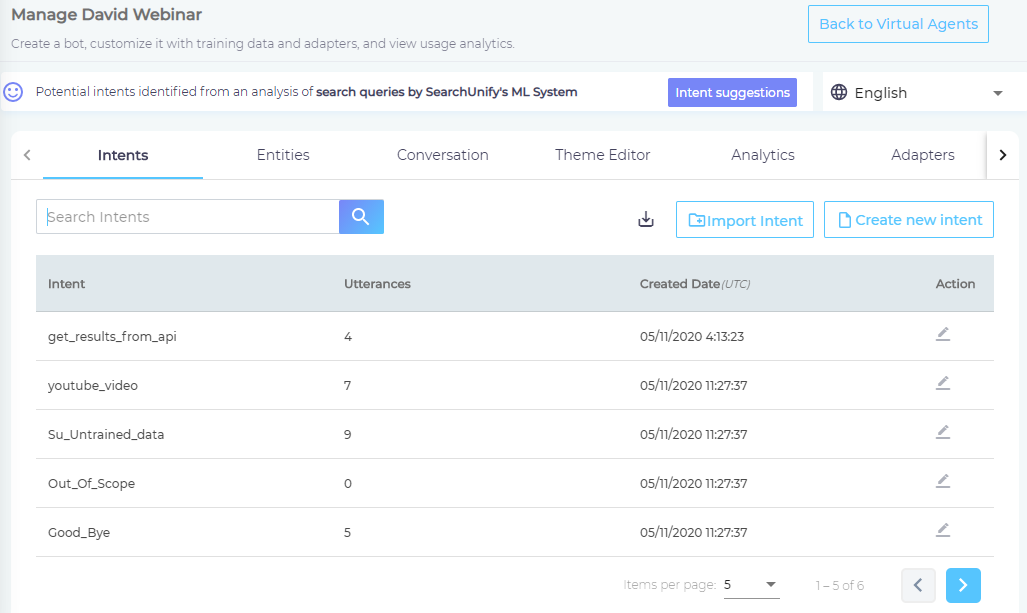
- From the main navigation, expand Apps and click Virtual Agent.

- Click
 to view settings.

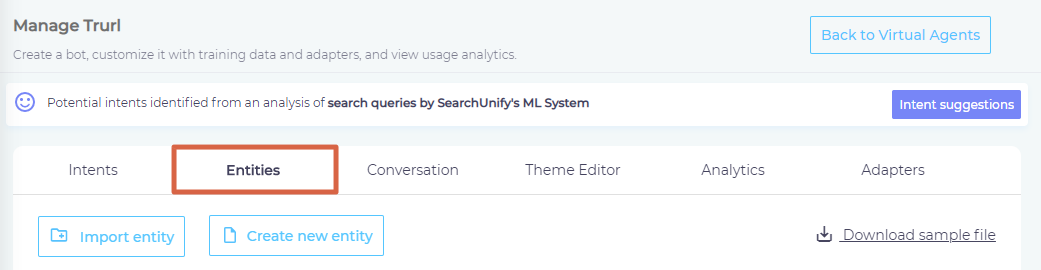
- Open the Entities tab.

- Click Create New Entity.
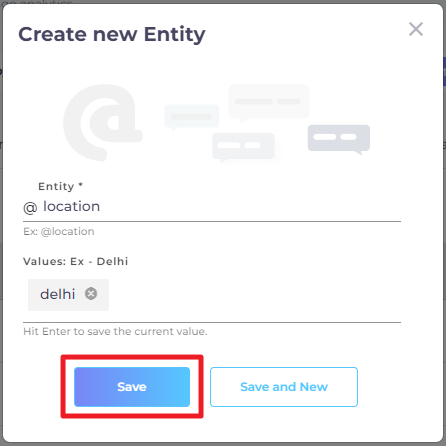
- In the dialog that has opened, give a name to your entity and mention the values that will be part of this group. You don't have to be thorough because you can always expand the group or contract it by removing values.
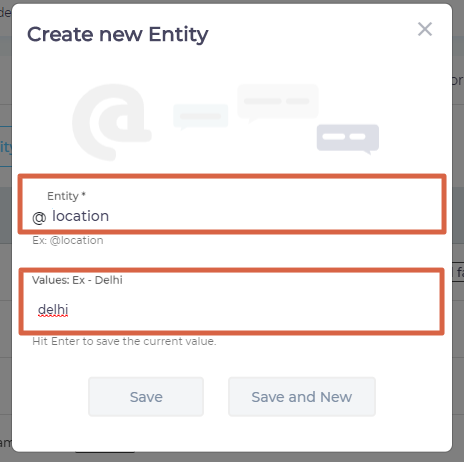
- Click Save. Your entity should be in the list.


Remove or Add Values from Entities
In case you realize that you have added a value that you don't really need or you entity can benefit from more values, you can do that with a click.
- On the entities screen, click .
- Use Backspace to remove values and/or enter new values from your keyboard. Use commas to separate values.
- Click SAVE to save your new group.
Import Entities in Bulk
A faster alternative is to import entities. Gather all your entities in a CSV file and use the Import Entity function to upload them. To learn about the correct format to be used in your CSV file, click Download Sample File ![]() .
.
Link Entities with Intents
Entities in themselves are of little business value. You know that they exist but their existence is of no value unless they are put to a use by being connected with intents.
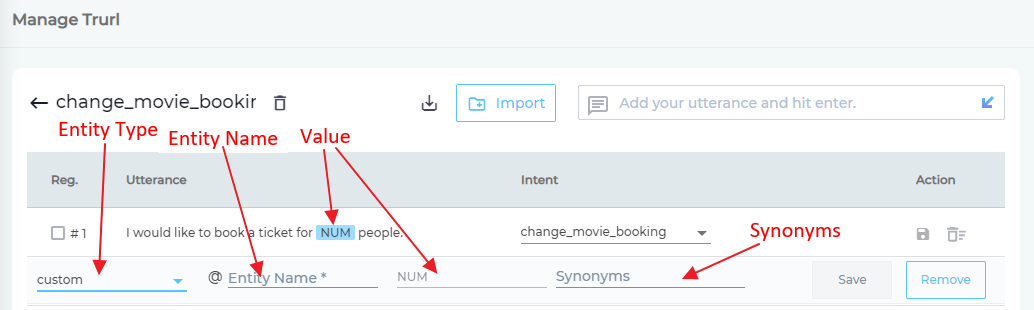
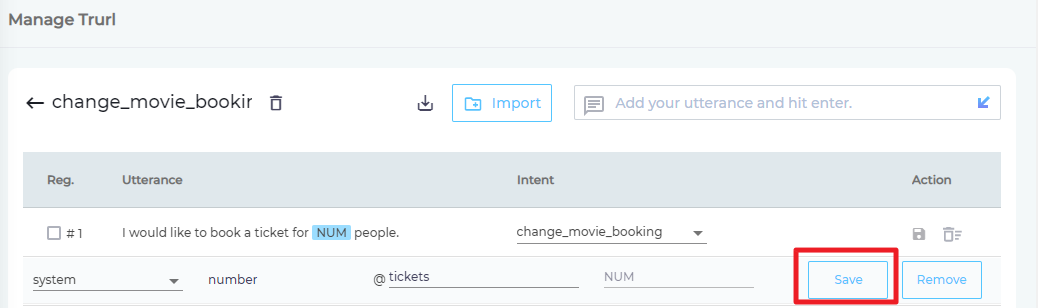
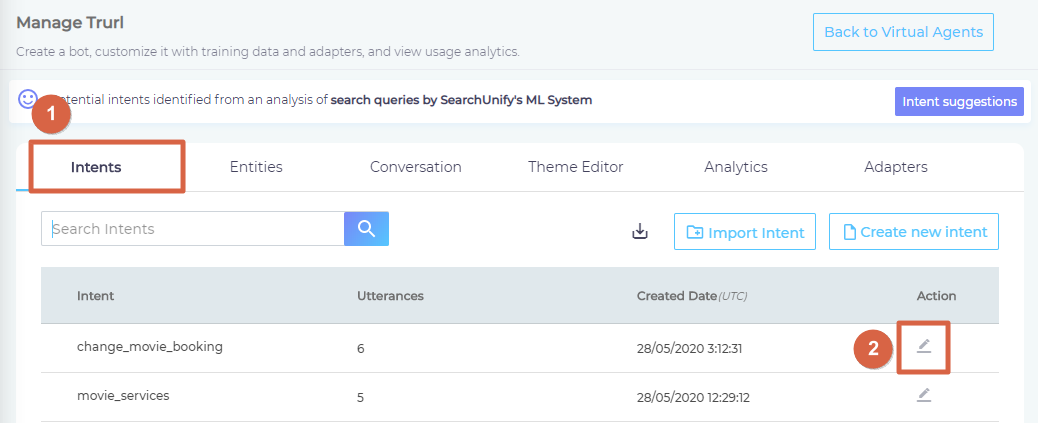
- To get started, go to Intents and open an intent for editing.

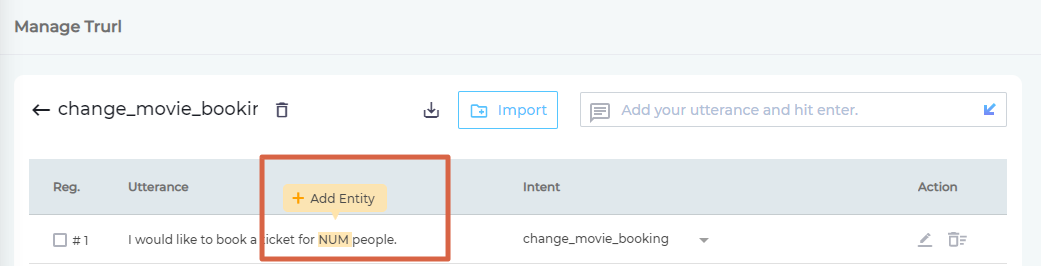
- Highlight a part of an utterance. The highlighted part functions as a value. A small yellow tooltip popup will inquire if you want to insert an entity. Click Add Entity to confirm.

- From the leftmost dropdown, select either System or Custom.
- If you have selected System, you will be asked to further specify the type.
NOTE. Select the value and a representive piece of text if you are selecting system entities.
Correct: (a) I'm17 yearsold. (b) Myticket ID is 123343.
Incorrect. (a) I am17years old. (b) My ticket ID is123343.
- For Custom, the second dropdown disappears.
- If you have selected System, you will be asked to further specify the type.
- In the field followed by an @, either select one of existing entities or create one from scratch.
- In the rightmost field, enter synonyms for the value.
- Save your settings.


Related
- Previous step: Add Intents and Utterances
- Next Step: Create Dialogs and Stories in Conversation