Create a Virtual Agent
Installing the Virtual Agent app is akin to hiring a whole team of support reps who help customers accomplish everyday tasks, such as logging tickets or finding resolutions to commonplace queries. A big difference being, Virtual Agent works 24x7 and never asks for a sick leave.
The app is highly configurable. It can be designed to help users buy airplane tickets, log cases, reserve a table in a restaurant, and pretty much everything that can be translated into conversations. The configurations range from the name of the bot to chat window design.
Once you have identified your business goals, a functional virtual agent can be deployed in a matter of a few hours. The harder part is to create stories around use cases. We will come to that later. For now, let's create a virtual agent.
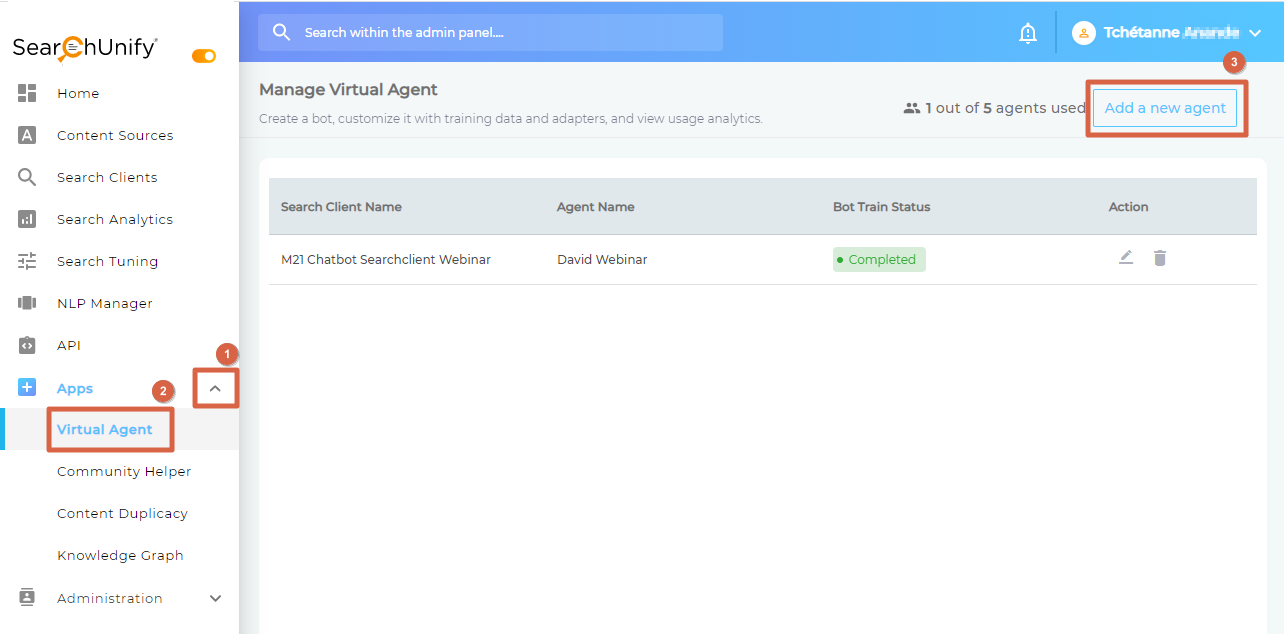
Virtual Agents Screen
The first step to adding a virtual agent is to expand Apps and click Virtual Agent and then Add a New Agent.
Add New Agent Dialog
Clicking Add a New Agent opens a dialog, Add New Agent. There are six fields on the dialog:
- Select Search Client. Virtual agents can be installed on a website, Salesforce org, Khoros community and Zendesk. To install an agent on a platform, choose a search client already installed on that platform. To know more about the role search clients play in the performance of a virtual agent, check out Reasons to Connect a Virtual Agent with a Search Client
- Agent Name. Names come in handy when you are managing multiple agents chattering incessantly over several platforms all at once.

Choose the one that make sense inside your organization because users are not going to see it.

Unlike the search client, a agent's name can always be changed. To rename, go to Theme Editor.
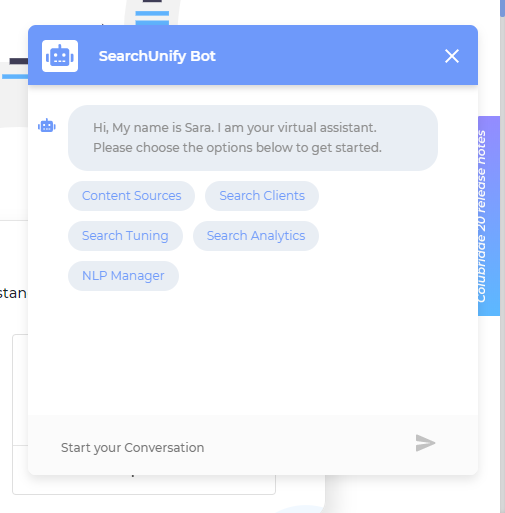
- Welcome Message. Once you have settled on a name, you can proceed to write the opening message, which can be a light-hearted greeting, such as Comment ça va ?, or a professional offer to help, such as the one seen in the next image.

The welcome message with options is picked from Theme Editor > Settings > Response.
- Language. Select the languages the agent will converse it. The virtual agent can be trained to converse in more than 25 languages. English is the default language for the virtual agent.


Finally, save your settings.
Related
- Previous step: Install a Virtual Agent
- Next step: Add Intents and Utterances