Installing Virtual Agent(s) to Source Platforms
After you've successfully added a Virtual Agent in SUVA, complete the installation process by deploying the Virtual Agent to the platform. Currently, four platforms are supported: Website, Salesforce, Khoros, and Zendesk.
 Website
-
Download the website Virtual Agent that you have just created.
-
Open the .zip file.
-
Open the readme.txt file. Follow the instructions given in the file to install the Virtual Agent to your website.
-
Copy the script in readme.txt file and put it either in the header or the footer of your website.
Save the changes. And you should be able to see the chatbot component on your website.
 Salesforce
Setting up Connection between Salesforce and SUVA
Only Salesforce admins can perform this setup so make sure you have the admin login privilege.
-
Download the Salesforce Virtual Agent that you have just created.
-
Open the .zip file.
-
Open the readme.txt file. Follow the instructions given in the file to install the Virtual Agent on your Salesforce-powered community. Before you start with the instructions, make sure you have performed the Pre-Installation Tasks for Salesforce Virtual Agent Installation.
-
Use the link from readme.txt file to download the SUVA package as it is currently not listed on AppExchange. You might be asked to log into Salesforce to complete the process. Finish the SUVA package setup.
-
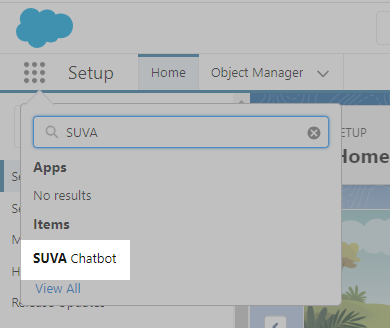
After you have successfully installed the SUVA package, navigate to Setup in Salesforce. Open App Launcher and search SUVA Chatbot item and open it.
-
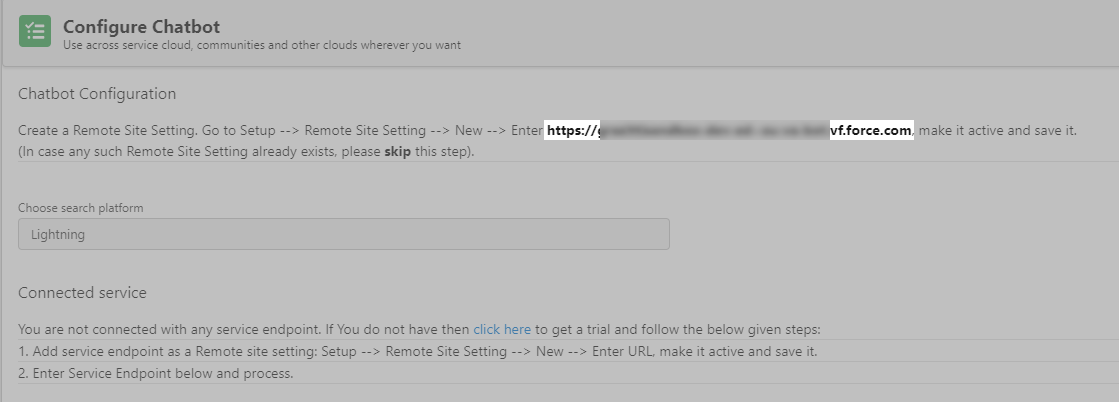
A configuration screen opens. At the top of the page, you can see the instructions to create a new Remote Site for the chatbot package link. For details, refer to the following doc:
Pre-Installation Tasks for Salesforce Virtual Agent Installation
-
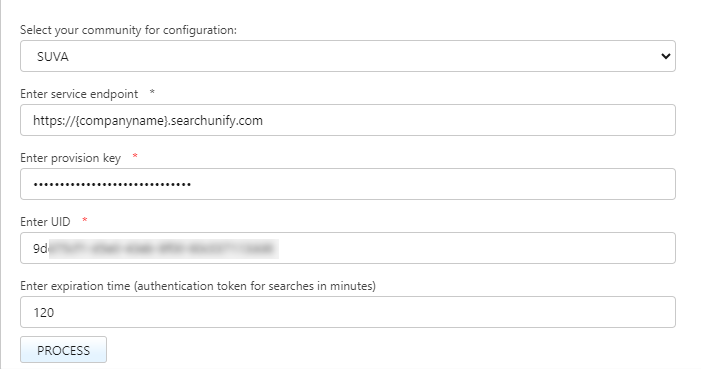
After you have created the Remote Site for the chatbot package URL. Enter the following details:
a) Select your community from Select your community for configuration dropdown.
b) Enter your Service Endpoint in the Enter service endpoint field. You can copy it from the readme.txt file.
c) Enter your provision key in the Enter provision key field. To get your provision key, contact the SUVA support team.
d) Copy the UID, given in your readme.txt file, in the Enter UID field.
e) Enter 120 (recommended value) in the Enter expiration time (authentication token for searches in minutes).
-
After entering all the details. click Process. You will see a success message when the connection is established successfully.
Publishing the Chatbot on Salesforce-Powered Community
-
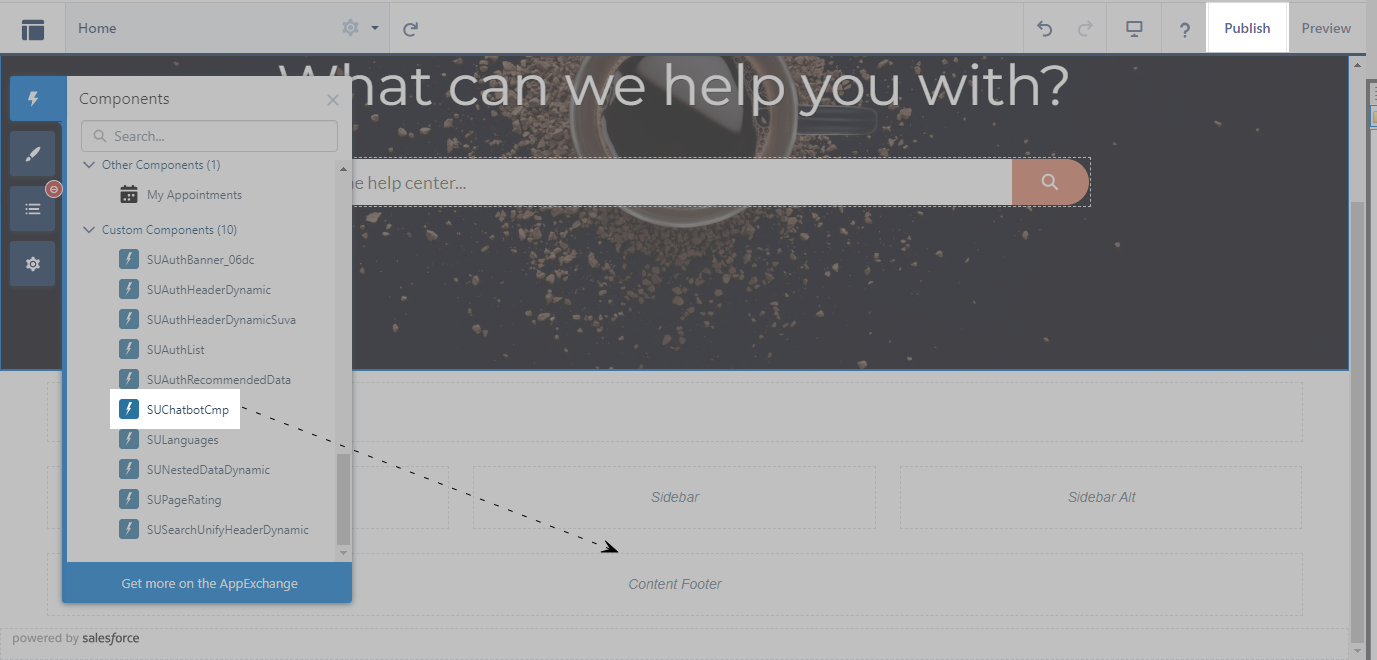
Log into your Salesforce Org and navigate to Setup -> Quick Find Box -> All Sites -> Open your community in the Builder mode.
-
Expand Components and drag SUChatbotCmp component to the Content Footer element.
-
Click Publish.
The process is complete. You should now be able to see the bot launcher icon on your community.
 Zendesk Guide
-
Download the Zendesk Virtual Agent that you have just created.
-
Open the .zip file.
-
Open the readme.txt file. Follow the instructions given in the file to install the Virtual Agent on your Zendesk Community.
-
Copy the script in the readme.txt file.
-
Log into your Zendesk instance and open Zendesk Guide.
-
Open the Guide Admin mode.
-
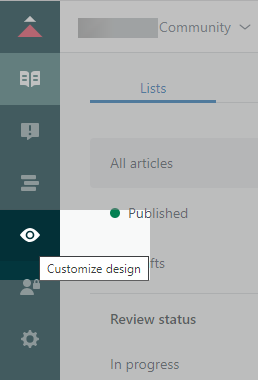
Go to Customize design.
-
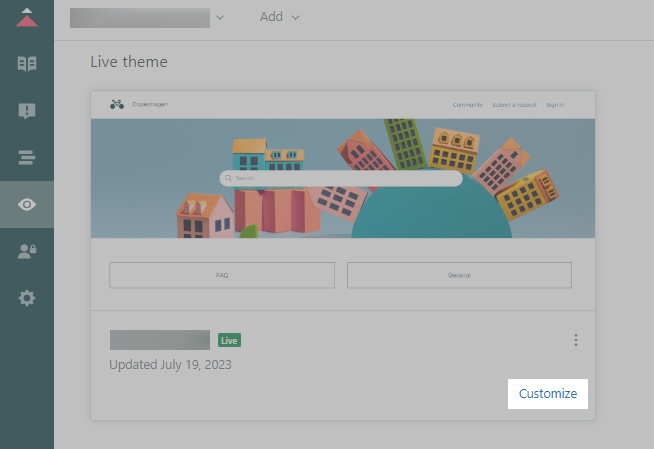
Customize the theme that is currently in use if there are more than one themes in there.
-
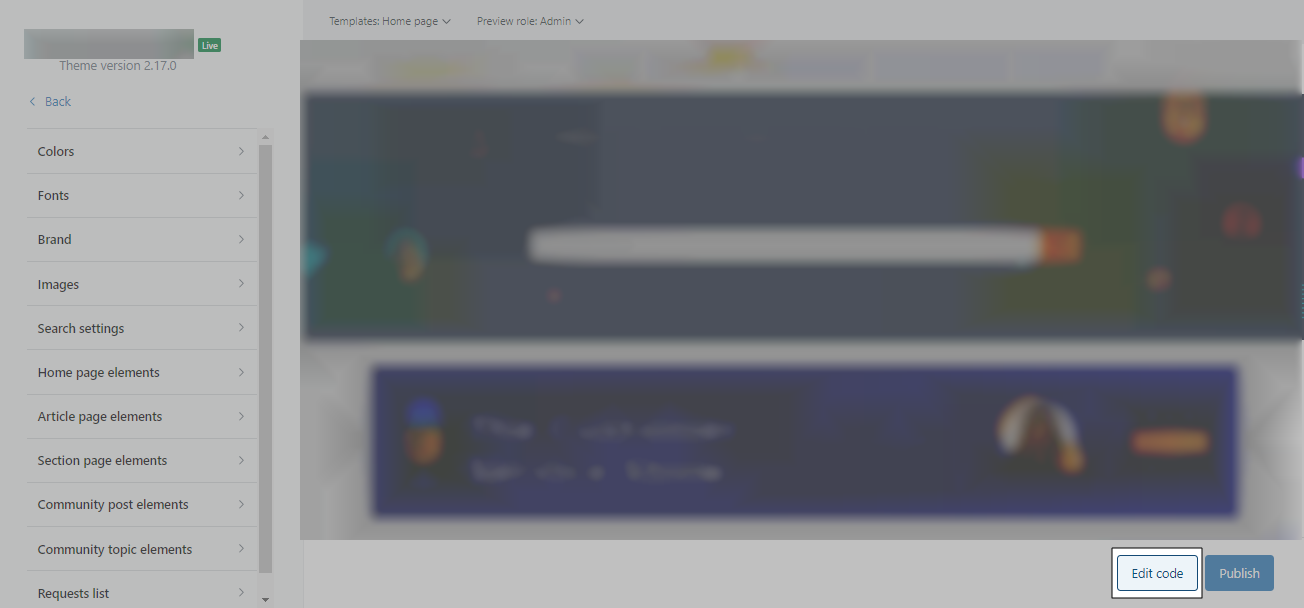
Click Edit Code.
-
Put the script that you copied from the readme.txt file in the Footer.hbs.
-
Publish the Changes
The process is complete. You should now be able to see the bot launcher icon on your community.
 Khoros
SUVA chatbot can only be hosted on a Khoros board. Follow these steps to host a chatbot in Khoros:
-
Download the Khoros Virtual Agent that you created.
-
Open the .zip file.
-
Open the readme.txt file. Follow the instructions given in the file to install the Virtual Agent on your Khoros Community.
Create New Component
-
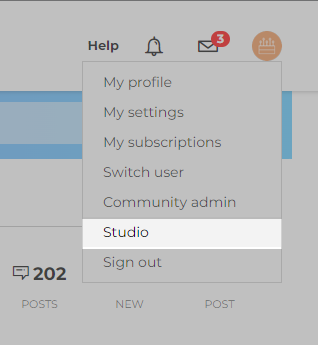
Log into your Khoros community as an admin. Click on the profile icon and select Studio.
-
Switch to the Components tab and click New Component.
-
Enter a name and click Create.
-
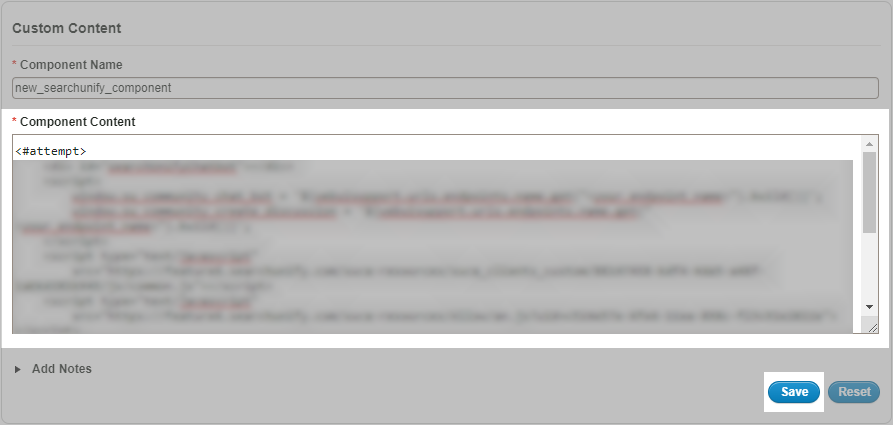
From the files extracted after downloading the Khoros Virtual Agent, open
searchUnify_chatBotComponentwith a text editor and copy the code. -
Paste the code in Component Content and press Save.
Create and Set up New Endpoints
-
Switch to Endpoints and click New Endpoint.
-
Name the endpoint in Title and click Save.
-
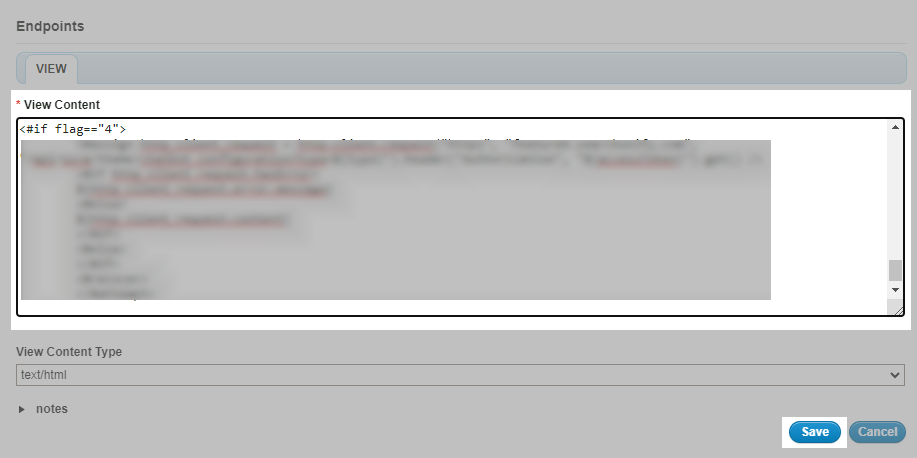
From the files extracted after downloading the Khoros Virtual Agent, open
searchUnify_chatbotand copy its code. -
Paste the code in View Content and press Save.
-
Create another endpoint using the code from searchunify_chatbot_create_article file.
-
Copy the name of both the endpoints that you added in the title (refer to step 2).
-
Return to Components.
-
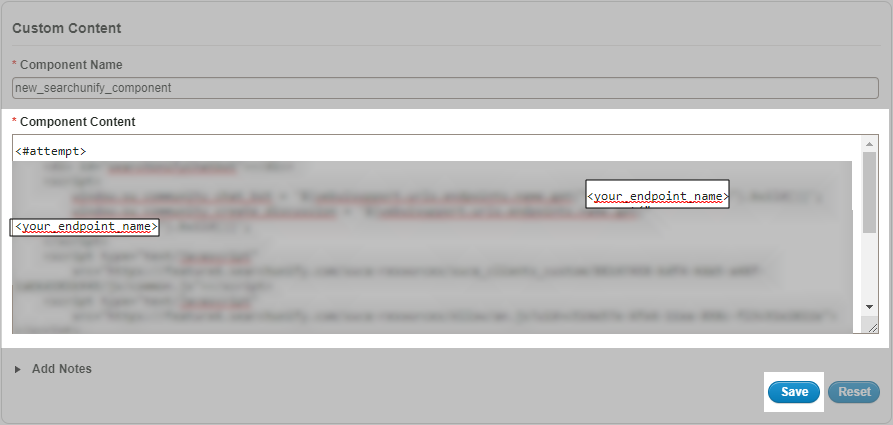
Open the component created in the previous section (new_searchunify_component).
-
Replace
<your endpoint name>with the name of both the endpoints you had copied (refer to step 6). -
Press Save.
OPTIONAL. Create a New Khoros Page
The Khoros component that you created is to be inserted into a Khoros page. You can select one of your existing community pages to host your SUVA bot, or create a new page. This section explains how to create a page in Khoros.
-
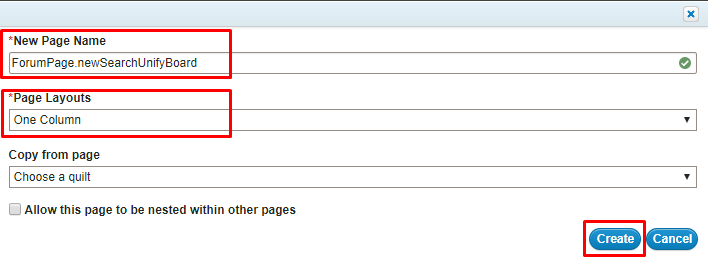
Navigate to Page, and click New.
-
Enter a page name in New Page Name prefixed by
ForumPage., select a layout from the Page Layouts dropdown (we recommend using One Column), and click Create.
Whitelist Your SUVA Endpoint
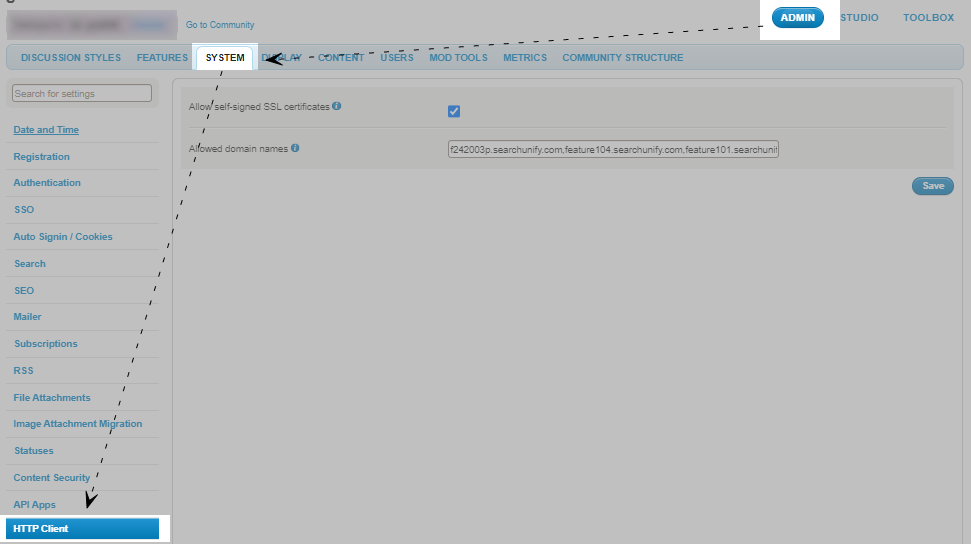
Navigate to Admin > System, and click HTTP Client.
In the Allowed domain names field, enter your Service Endpoint (your SUVA instance URL). Finally, click Save.
Insert SUVA Component in a Khoros Page
-
From Admin > Page, open the page on which you want to use the SUVA bot. You can select the new page that you created or an existing page.
-
Expand Custom Components.
-
Click
 to add the component on the selected page.
 -
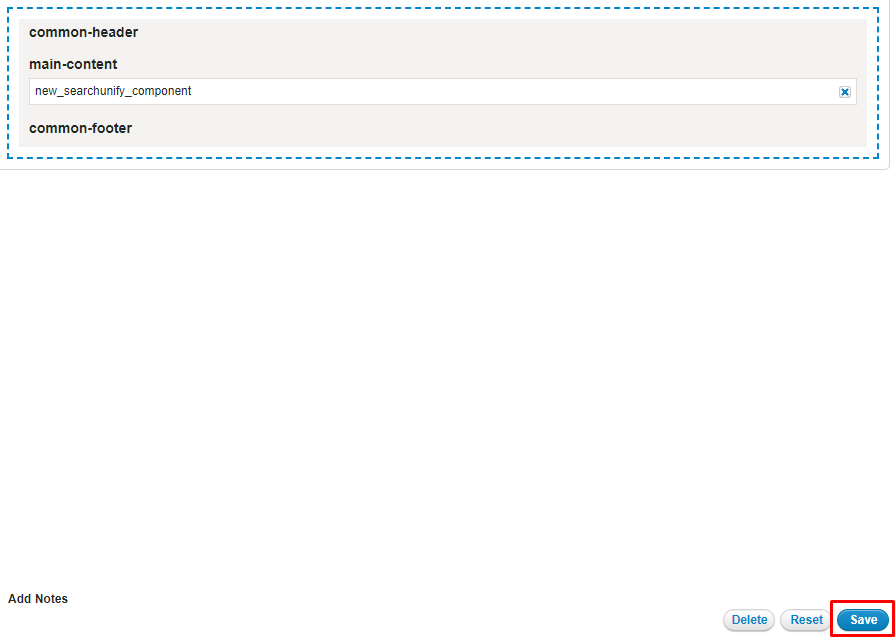
Drag the component to
main-contentand press Save.
Insert SUVA Bot on a Khoros Board
-
Navigate to Admin > Community Structure.
-
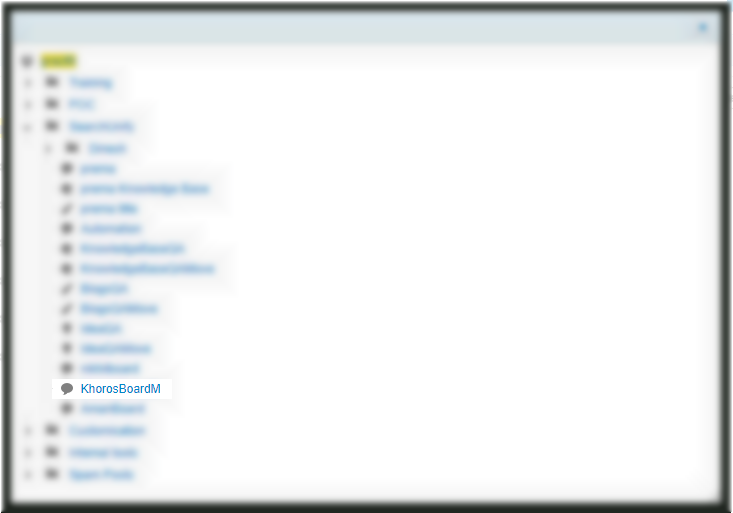
Click on Choose to select the Khoros Board on which you want to insert the page. For illustration, we selected the KhorosBoardM.
NOTE. Be sure to select only a Khoros board. No other Khoros object is supported in SUVA.
-
Navigate to Content > Custom Pages.
-
In the Forum Page dropdown, select the page on which you deployed the SUVA component (refer to the Insert SUVA Component in a Khoros Page section). And click Save.
-
Click Go to Board and you will land on the page where your SUVA bot is available.
The process is complete. You should now be able to see the bot launcher icon on your community.


