Add Variables to Hyper-Personalize Chatbot Interactions
Variables utilize the user information and other dynamic content used during chatbot interactions to personalize chatbot interactions for the end users. They enable the chatbot to remember important details, follow logical rules, and adapt its responses based on user actions or company-specific information.
You can set up user-specific and company-specific variables, helping chatbot track conversations and customize responses. Given below are some examples of how variables are used:
-
Variable is user.name and it can be used to personalize greetings.
Chatbot greeting: "Hi {{user.name}}, welcome back! How can I help you today?"
If the user previously shared their name as "John," the response would be: "Hi John, welcome back!"
-
Variables are ticket_status and ticket_id and these can be used to get support ticket status.
Chatbot response: "Your support ticket {{custom.ticket_id}} is currently {{u_ticket_status}}. We will update you as soon as there’s progress."
If the ticket ID is "45678" and the status is "in progress," the bot responds: "Your support ticket 45678 is currently in progress."
To configure adapters in your SUVA-powered chatbot, edit the virtual agent of your chatbot and go to the Variables tab.
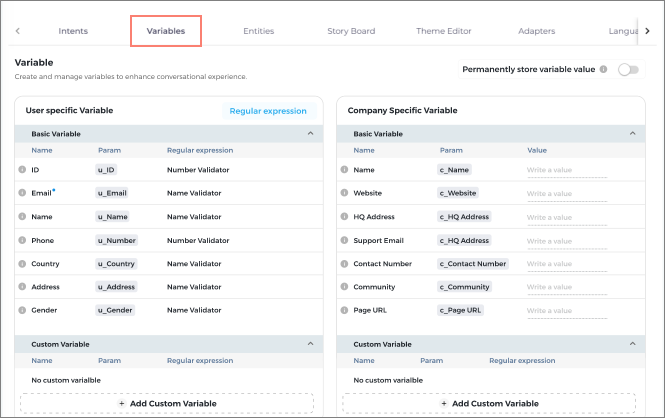
Fig: The above image shows how the Variables screen looks like.
You can see two categories of variables; 1) User Specific Variable and 2) Company Specific Variable. There are some basic variables that are preconfigured by default.
Note: Admins cannot change the value of variables that are fetched from the platform itself. These variables are differentiated with a blue dot as shown for the Email variable as shown in the image above.
Permanently store variable value: Toggling it on will save the variables in the database and use them for all sessions, including follow-up sessions. Otherwise, the variables will work on the basis of information provided during a session.

Fig: The above image highlights the Permanently store variable value toggle.
You can add more variables in Custom Variables based on specific business logics or chatbot flows. For example, you can add a variable - Preferred Language {{u_preferred_language}}.
Custom variables are often updated based on conditional logic or workflows. For instance, if a user selects a preferred language, the chatbot can store it in {{u_preferred_language}} and use it throughout the session.
The parameters for user specific custom variables start with u_ and start with c_ for company specific custom variables.
While basic User Specific Variables are fully preconfigured, basic Company Specific Variables require a value to be added by admins.
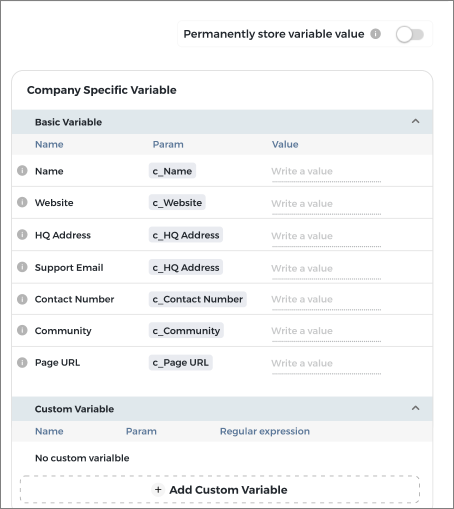
Fig: The above image shows the Company Specific Variables.
Adding Custom User Variables
-
Click Add Custom Variable in Custom Variables right below the User Specific Variable section.
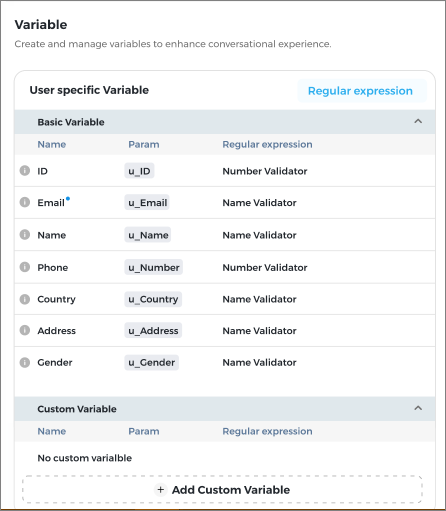
Fig: The above image shows the User Specific Variables.
-
Enter the required details:
-
Name: Give your custom variable a name.
-
Param (Parameter): Add a parameter for your variable. The variable should not include any space, numeric characters, and any special characters, except _ (underscore).
-
Regular Expression (REGEX): Select a regular expression from the dropdown. There are preconfigured REGEX values among Basic Variables. To add custom REGEX values, click Add Custom Regular Expression.
-
Description: Add a description of the variable you are adding.
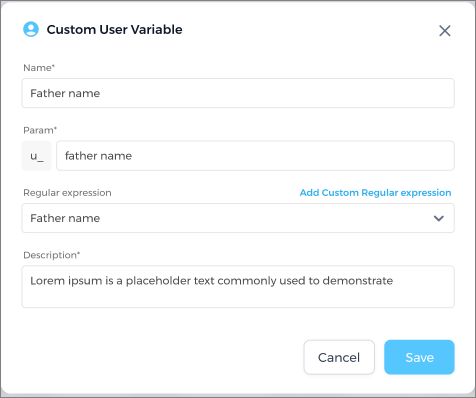
Fig: The above image shows the screen showing required details for creating custom user variable.
-
-
Click Save when you have added all the details.
-
Another way to add custom regular expressions, click Regular expression.
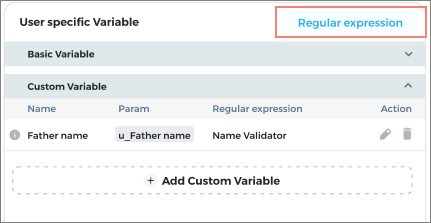
Fig: The above image shows the Regular expression button in the User specific Variable tab.
-
You can see the list of preconfigured Regular Expressions. Click Add expression to add new expressions.

Fig: The above image shows the Regular Expression section.
-
Give your REGEX a Name, define the Expression value, and add a Description. Click Save to add the regular expression.
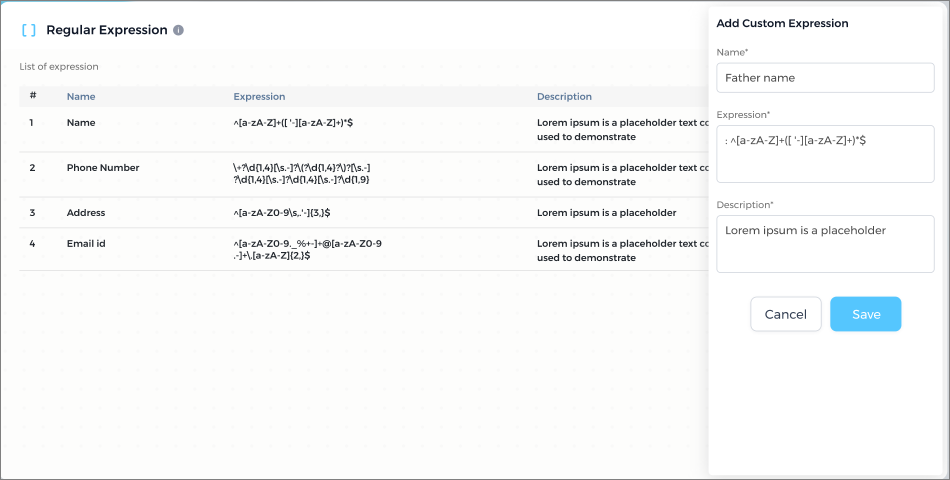
Fig: The above image shows the Add Custom Expression screen in the Regular Expression section.
The Regular Expression you created will now be available in the Regular Expression dropdown when you create a custom user variable.
Adding Custom Company Variables
-
Click Add Custom Variable in Custom Variables right below the Company Specific Variable section.
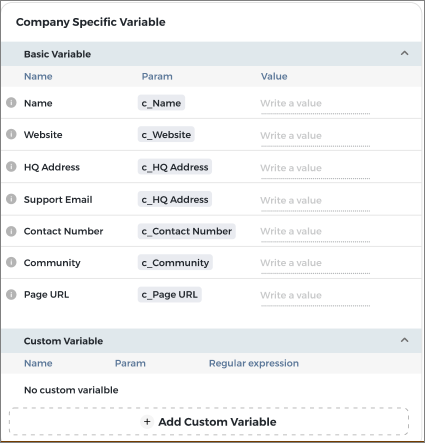
Fig: The above image shows the Add Custom Variable button on the Company Specific Variables tab.
-
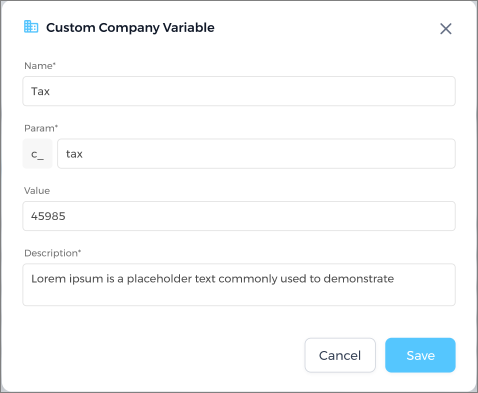
Enter the following details and click Save.
-
Name: Give your custom variable a name.
-
Param (Parameter): Add a parameter for your variable. The variable should not include any space, numeric characters, and any special characters, except _ (underscore).
-
Value (Optional): Enter a value for the parameter defined in the custom variable.
-
Description: Add a description of the variable you are adding.
-
In conclusion, variables are essential for enhancing chatbot interactions by making them more personalized, dynamic, and context-aware. By effectively using different types of variables, chatbot developers can improve engagement, streamline workflows, and create a more responsive and user-friendly experience.
Edit or Delete Custom Variables
You can edit a custom variable. You can edit it by clicking on the edit  icon and remove it by clicking on the delete
  icon.
icon.
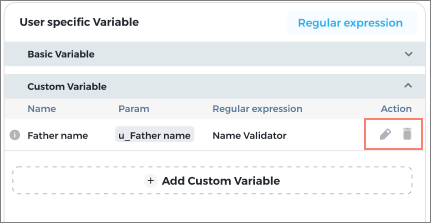
Fig: The above image shows the Edit and Delete options on a custom variable.
Add Variables to Storyboard
To use the Variables that they created, admins need to add these variables in the storyboard, like in the Greetings story or any other stories.
You just need to copy the Variable PARAM and paste it in the Storyboard responses or you can search the variables by using "@" and you can select the variable you want to use from a list of all the configured variables.
Related Doc:Story Board and User Feedback
Last updated: Friday, July 17, 2026