Get to Know SUVA Response Types: Actions
Webhooks enable you to do some really exciting stuff. You can fetch input from Bot Memory, plug input into API calls, and convert the returned data into chat messages. The messages can themselves be formatted in HTML. What makes Webhooks truly exciting is the fact that you can make calls to your own APIs and to any third-party APIs.
NOTE.
-
There is no way to check if a webhook works during a node's creation. You can test a webhook by making requests through it.
Webhook
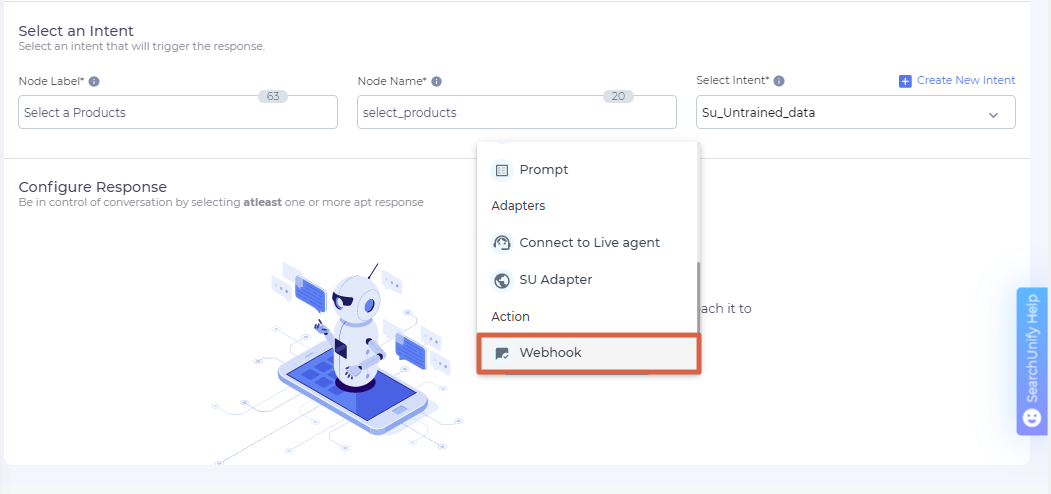
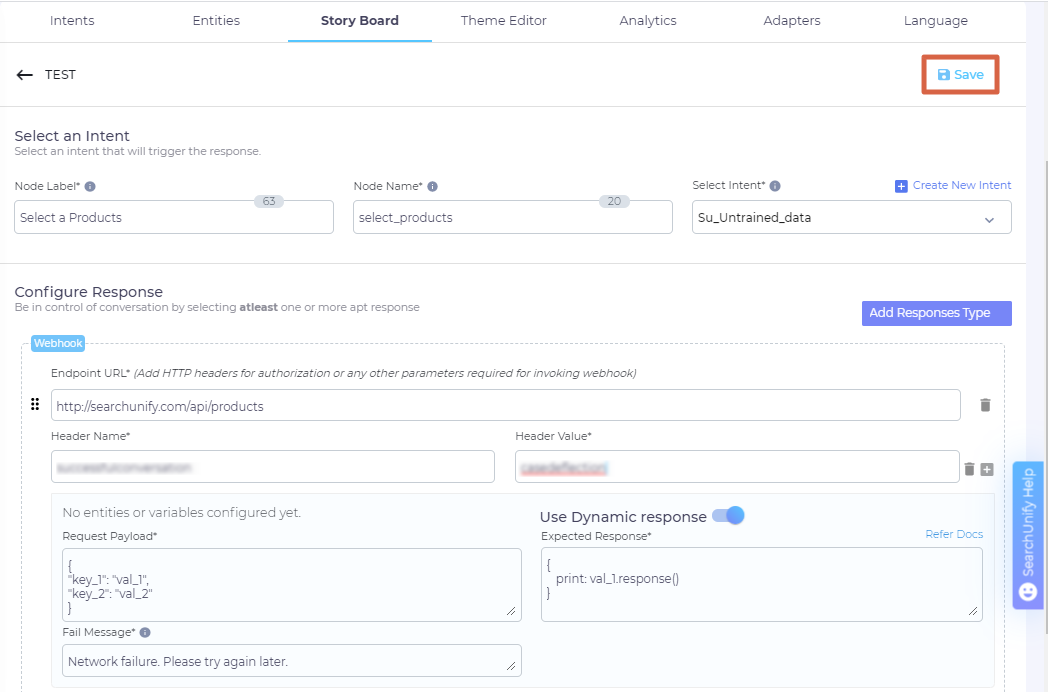
- Click Add Response Type and select Webhook from Actions.
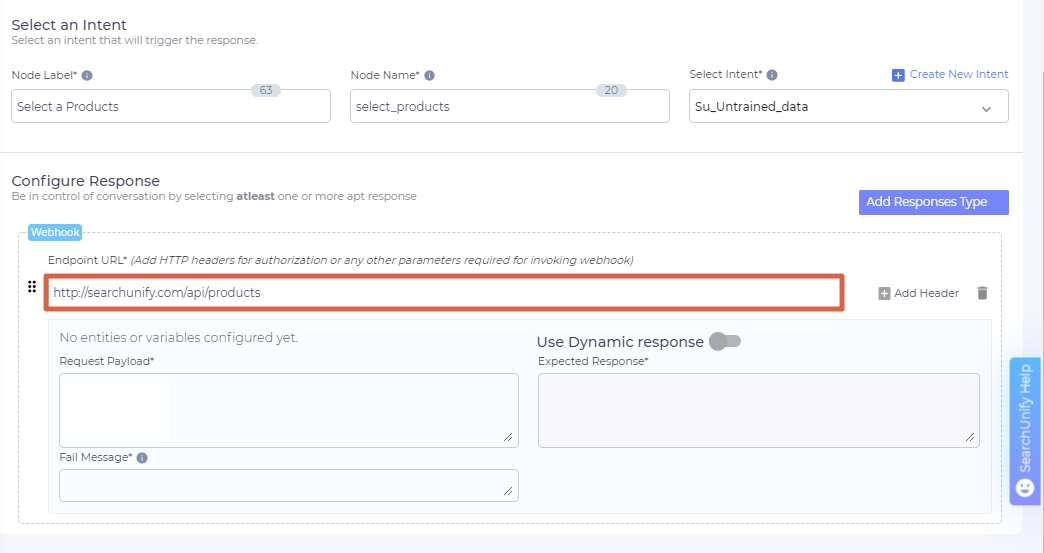
- Enter the endpoint URL in top field.
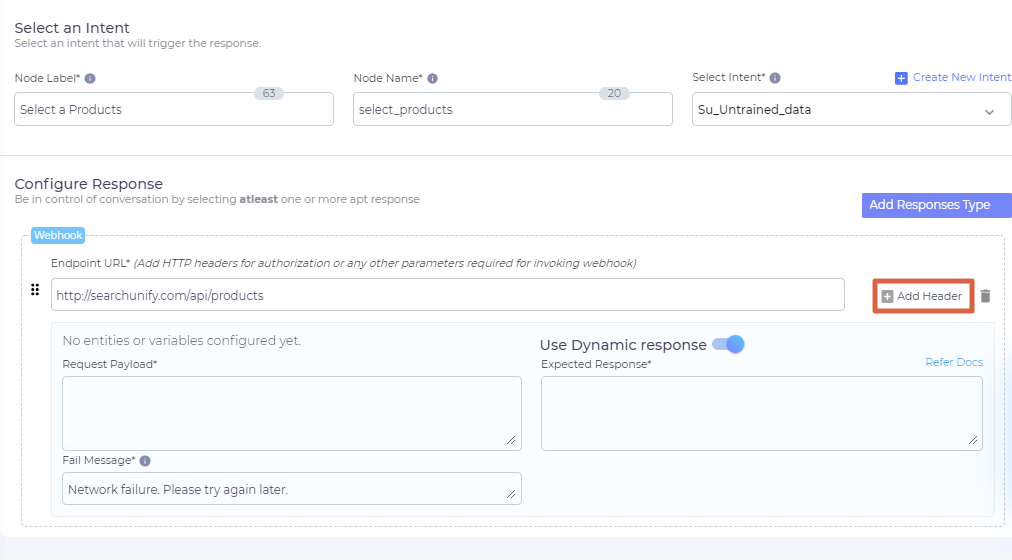
- Click Add Headers to insert headers to go with the Endpoint URL.
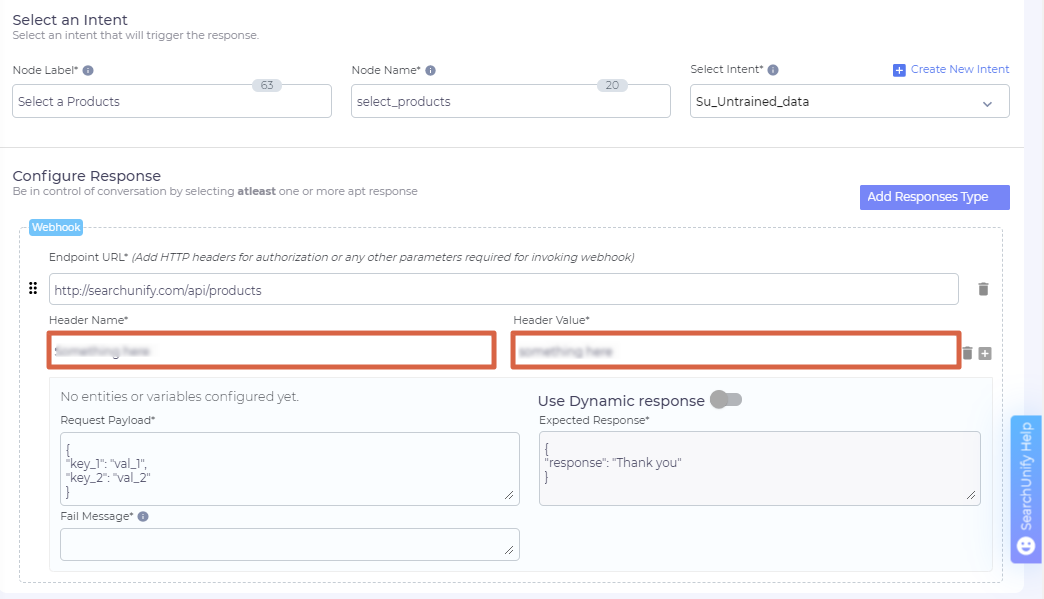
- In Header Name and Header Value, add the authentication parameters used to access gated APIs.
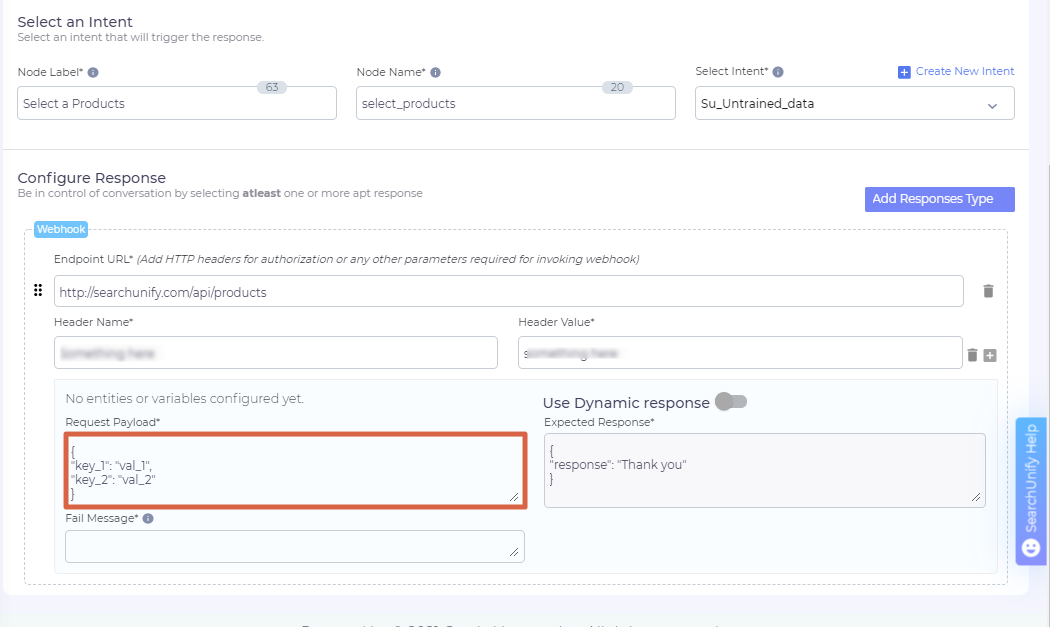
- Write the code to call the API in Request Payload. You can use entities in the payload in the format
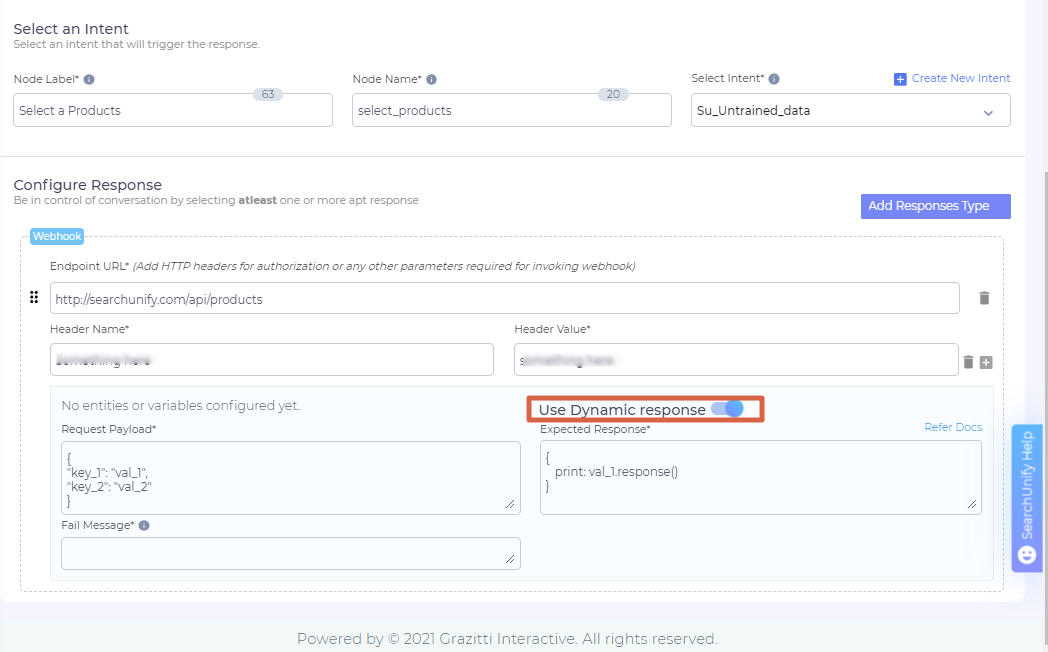
${{entity_name}}. - Turn on Use Dynamic Response if a different input is expected in each response.
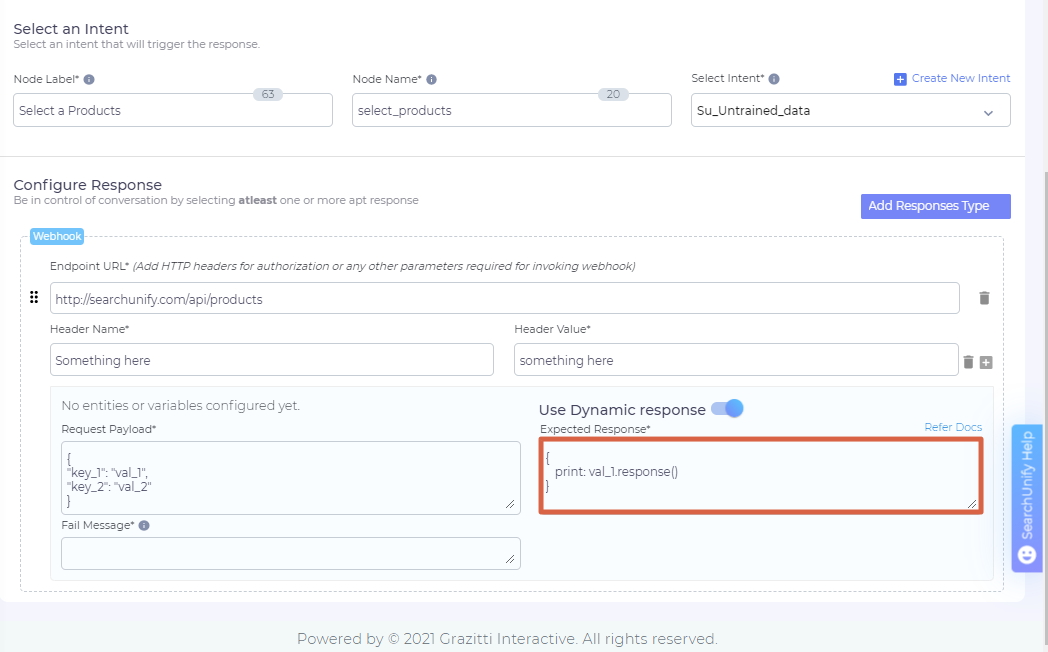
- Configure the output on the chat window in Expected Response.
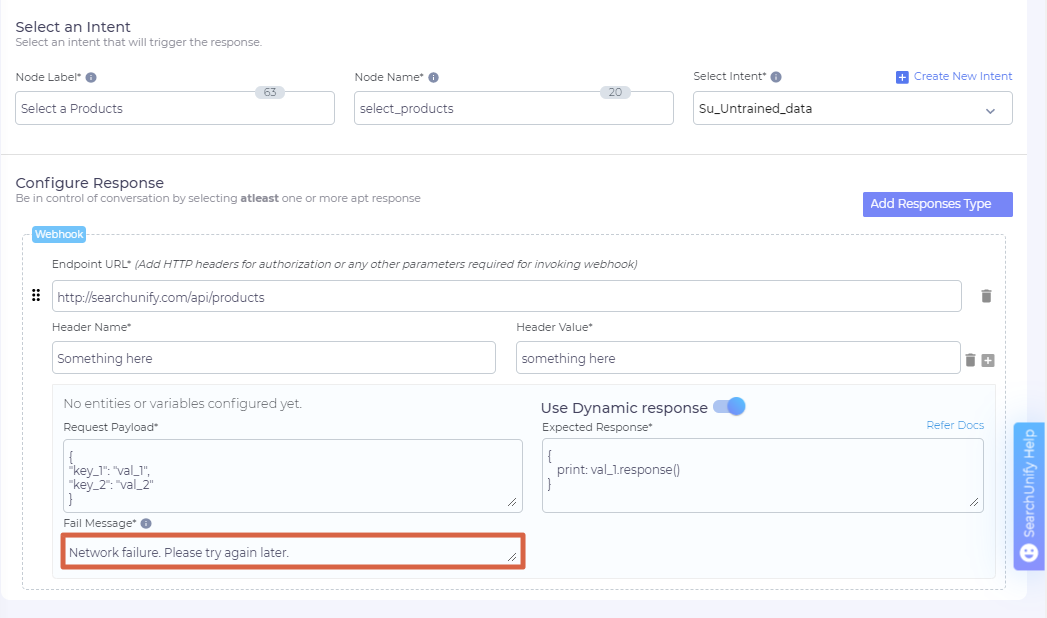
- To display a message when webhook fails, enter a descriptive message in Fail Response.
- Scroll up and click Save.
Add or Delete a Response on a Node
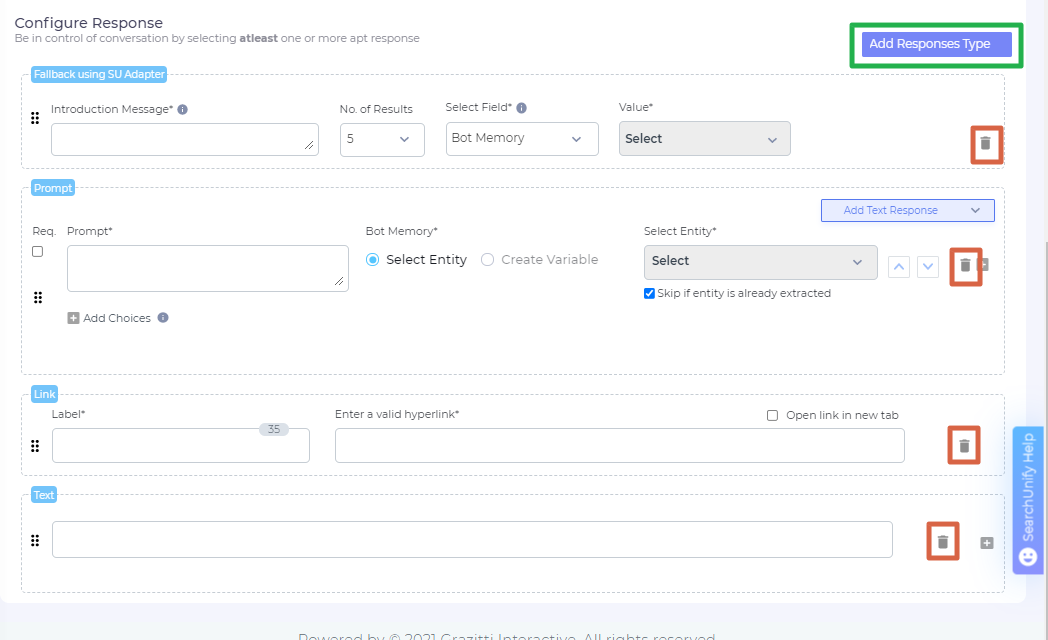
An admin can insert multiple responses into a node. When business requirements change, the admin can add or delete a response. To add a response to an existing node, click Add a Response and remove an existing response, click ![]() . The function is at the extreme right of each response.
. The function is at the extreme right of each response.
Once you have made the changes, scroll up and Save them.
Change Response Order
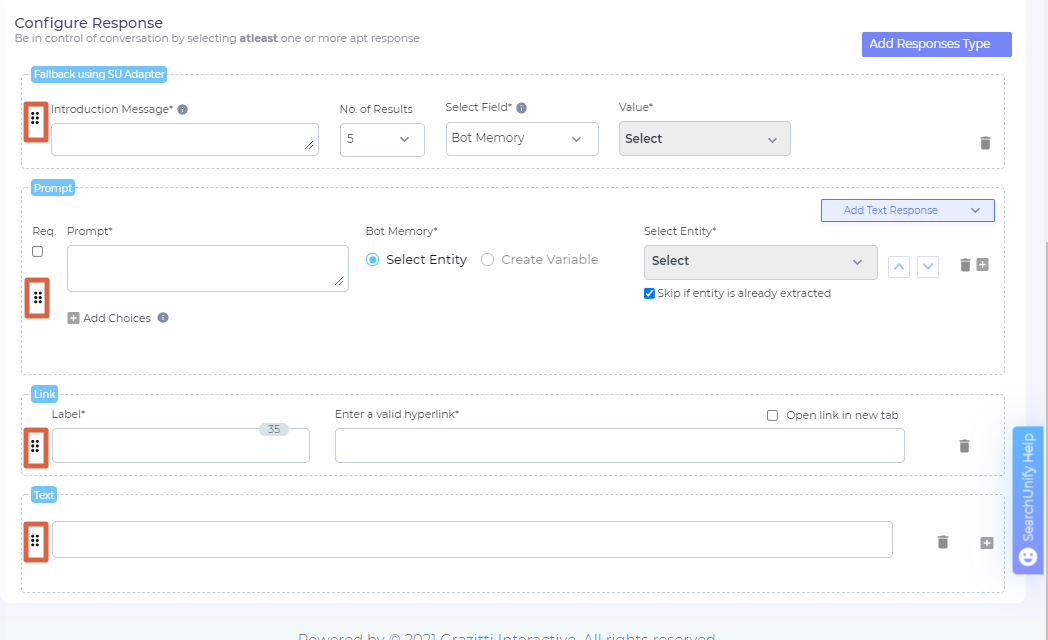
A node can house two or more responses. In the default set-up, the latest response ends up on top. But you can change the default order. Use ![]() to drag responses up and down.
to drag responses up and down.
Once you have made the changes, scroll up and Save them.
Last updated: Thursday, September 25, 2025
