Add A New Virtual Agent
Setting up SUVA is akin to hiring a whole team of support reps who help customers accomplish everyday tasks, such as logging tickets and finding resolutions to commonplace queries. A big difference between setting up SUVA and hiring a new team is that the former works 24x7 and never asks for a sick leave.
Supported Platforms
SUVA is a highly-configurable app. You can set it up on Salesforce, Zendesk, Khoros, and websites where it can wait on visitors and, whenever invoked, help them buy airplane tickets, log cases, and reserve a table in a restaurant. Pretty much everything that can be scripted into conversations can be handled by SUVA. Or do you want SUVA to function as a sales agent and sell products, book demo calls, and capture email addresses for marketing? Once the goal has been specified, a you can go from zero to a functional SUVA in a matter of a few hours.
SUVA can be set up within few minutes in organizations, whose goal is to install a virtual agent for customer support and HR support. SUVA is configured to help you manage both these scenarios out of the box.
Adding a Virtual Agent
There are two ways a user can log into SUVA:
a) Log into SUVA using the domain provided to you while setting up your instance (https://{domainname}.searchunify.com/suva). Both SearchUnify and non-searchunify users can use this.
b) A SearchUnify user can also install and auto-login to SUVA from Marketplace in SearchUnifyadmin panel.
-
Once you are logged in, an empty screen greets you if you have logged in for the first time. Else, a list of current SUVA virtual agents is visible. On either screen, find and click Add a New Agent.

-
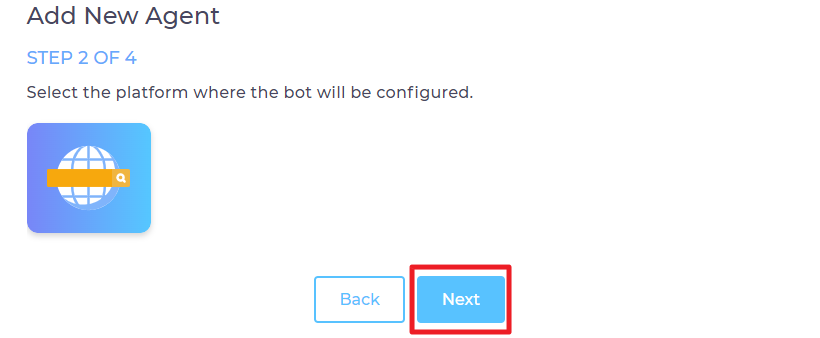
Select if you want to add the virtual agent for Customer Support or for HR Support users and Click Next.


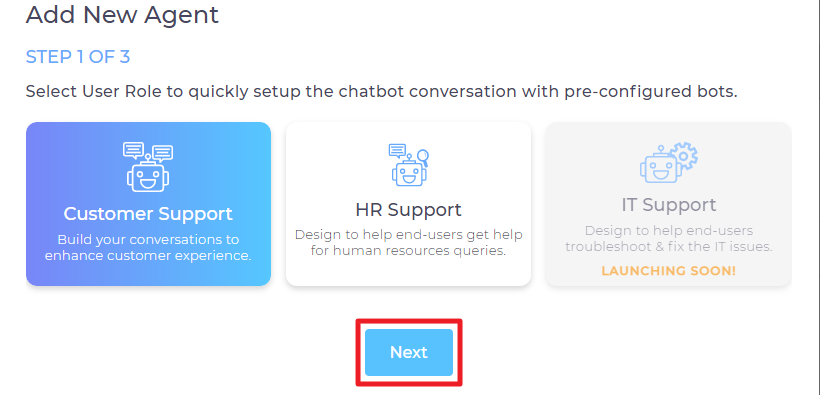
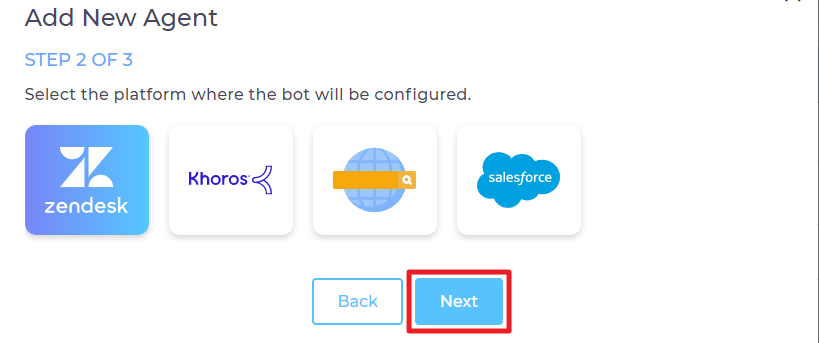
a) Virtual agent for customer support can be set up on Zendesk Guide, Khoros, website, and Salesforce. Select a platform for configuration and click Next.
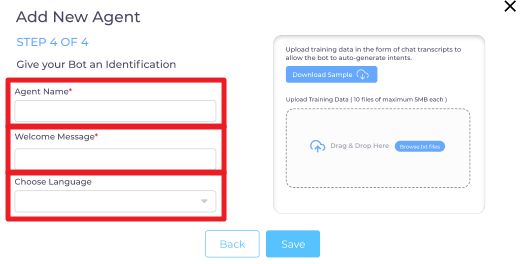
b) Enter the following details:
Each virtual agent has an Agent Name to give it an identity. A unique name helps you locate an agent when multiple agents are in use.
An agent can greet users with a "Ciao!", "Bonjour!", or a simple "Howdy?" Configure the greeting in Welcome Message.
The last setting is Choose Language, where you can select the default language SUVA will converse with visitors.
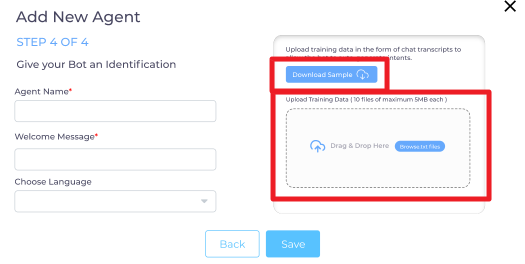
You can also upload the chat transcripts in .txt file format. This will help the bot to auto-generate intents. You can simply drag and drop the file here as well. To know the format of the .txt file, you can also download a sample file.
Note: Chat transcripts are of value to you as well if you were earlier using another chatbot or even a live agent. These can help SUVA understand user intents.
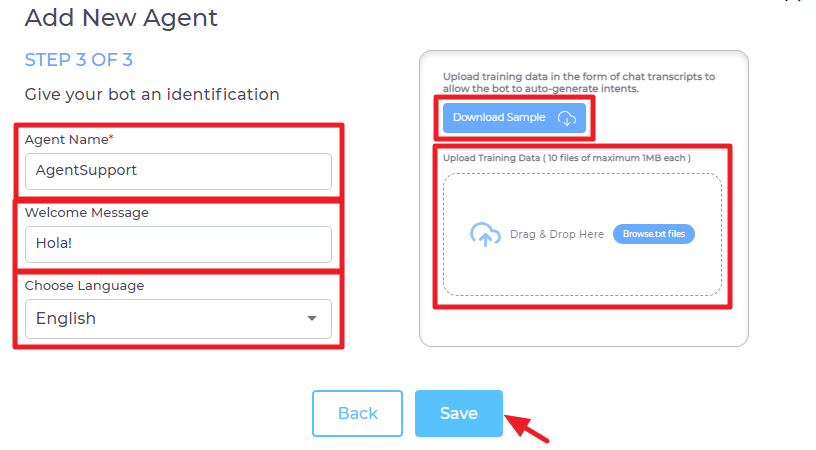
c) Click Save.
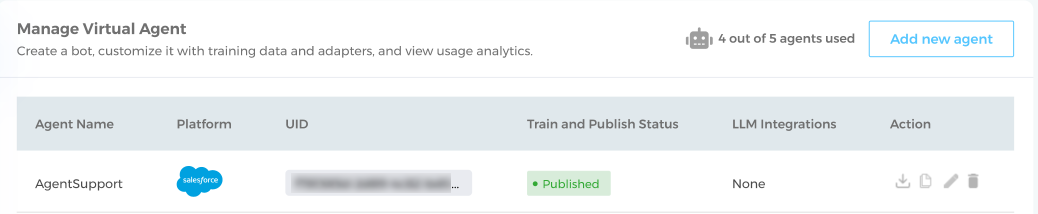
You will land to the Manage Virtual Agent screen. You can also see the list of configured virtual agents on the home page next time you log into SUVA.
a) From Manage Virtual Agent screen, click Add a new agent and select HR Support as the agent role. Virtual agent for HR support can be set up on a website. Select it and click Next.
b) You will see three different templates; 1) Operations, 2) Training and Policies, and 3) Company FAQs. Select one or more templates and click Continue. You can Skip this part if you don't select any of the listed templates (Skip button is only visible when you don't select a template).
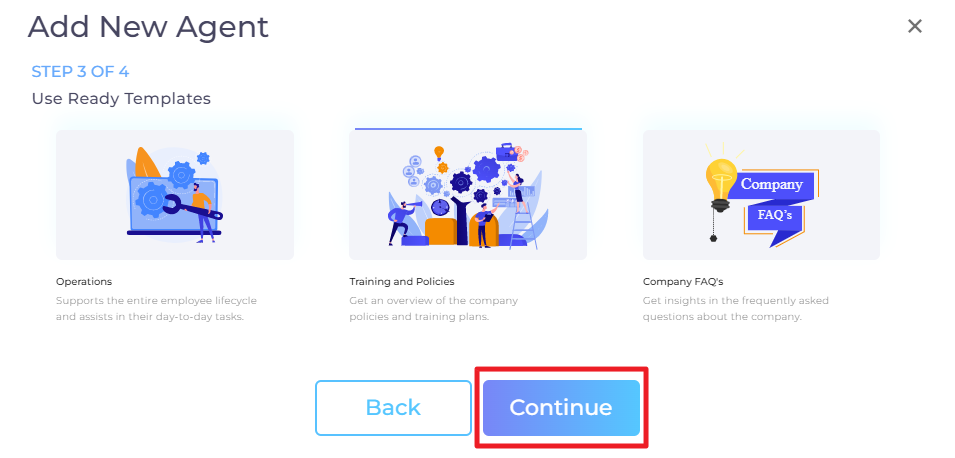
Each of the aforementioned templates involve pre-defined chatbot stories including related intents, entities, and responses. These are helpful since you need not to add the training data from scratch. For example: the Operationstemplate includes stories for Leave Application, Leave Balance, and Holiday Calendar. So, you get an agent loaded with training data if you select a template and can edit it as and when required.
c) Enter the following details:
c.a) Agent Name. Give a name to your virtual agent.
c.b) Welcome Message. Enter here a welcome message, e.g. Welcome, how can I help you?
c.c) Choose Language. Select a language for your agent.
d) You can also upload the chat transcripts in .txt file format. This will help the bot to auto-generate intents. You can simply drag and drop the file here as well. To know the format of the .txt file, you can also download a sample file.
e) Once done, click Save.
You will land to the manage virtual agent screen. You can also see the list of configured virtual agents on the home page next time you log into SUVA.